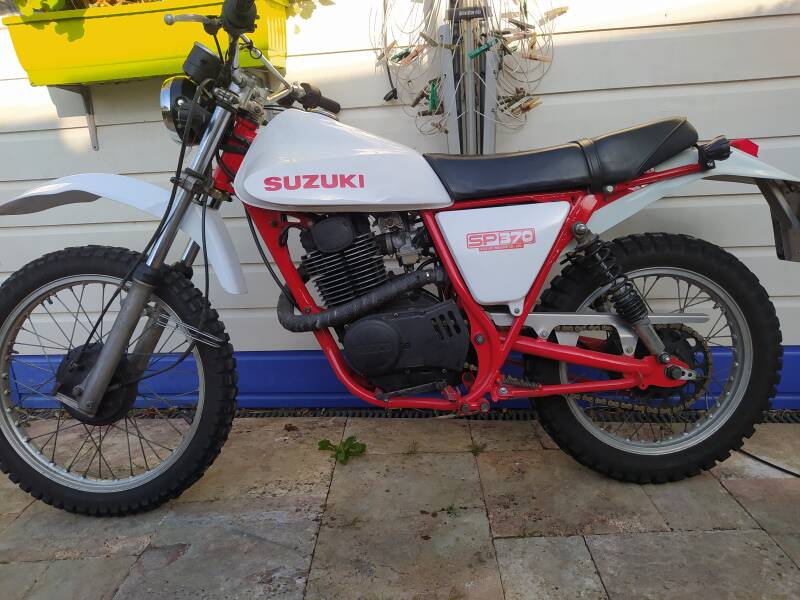
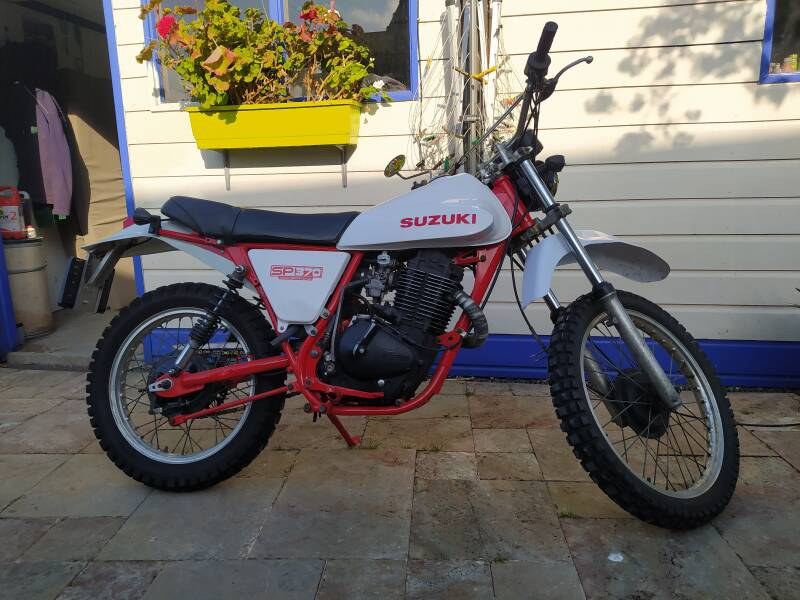
2020 Suzuki SP370
Recently bought a batch of parts from Suzuki's answer to the iconic Yamaha XT500 from the late 70's. Although not as succesfull as it's counterpart the SP370 was a nice little thumper and very reliable. I have enough parts to assemble at least two bikes although I'm missing some bits. Some parts have proven very difficult to find or are just too costly. So some improvising may be neccessary. I've put one bike together in rough condition and it runs and rides quite nicely.
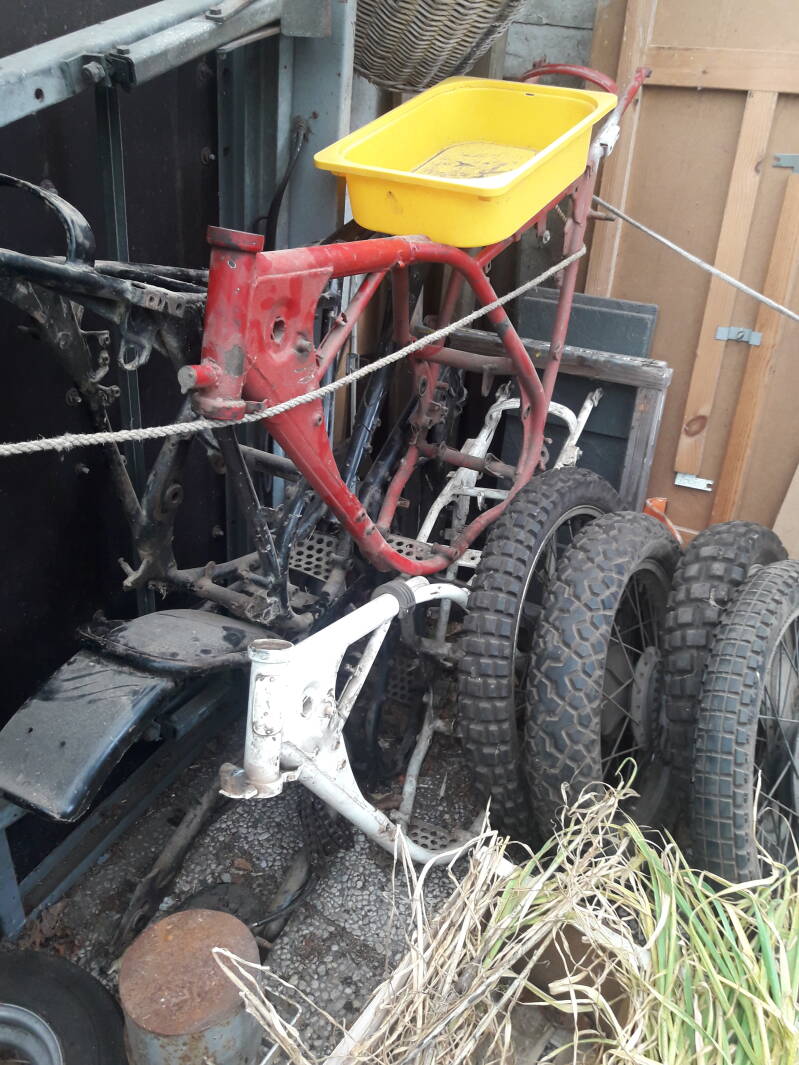
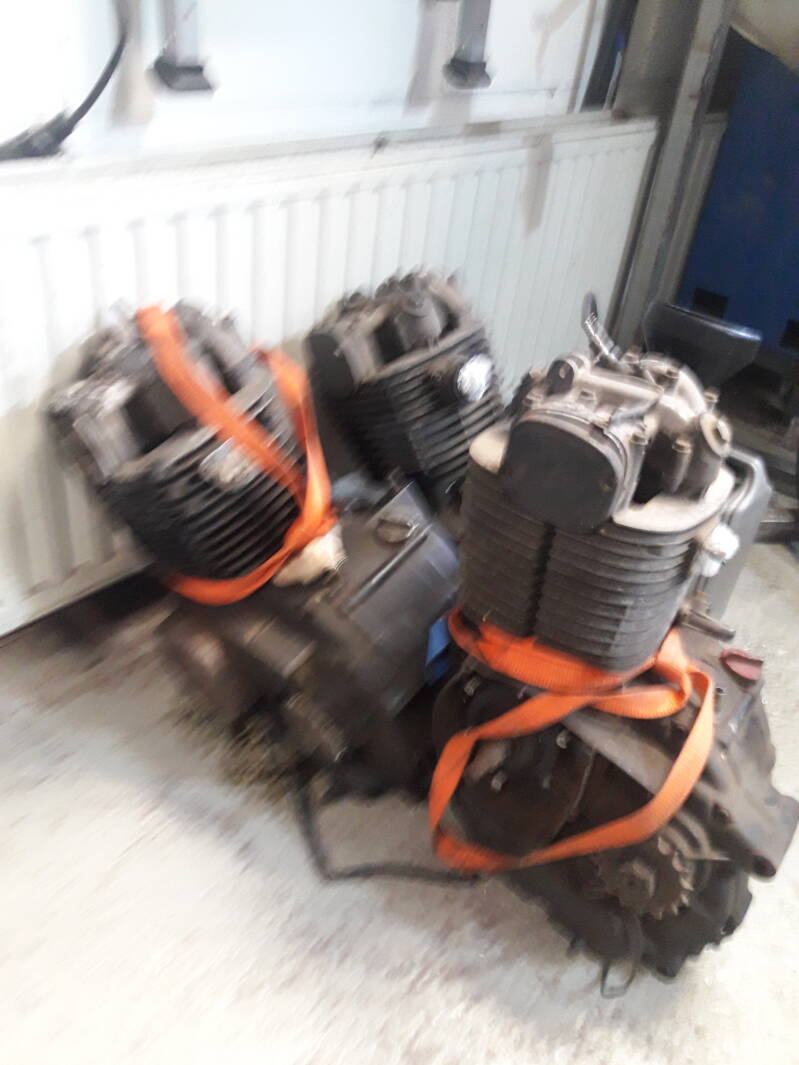
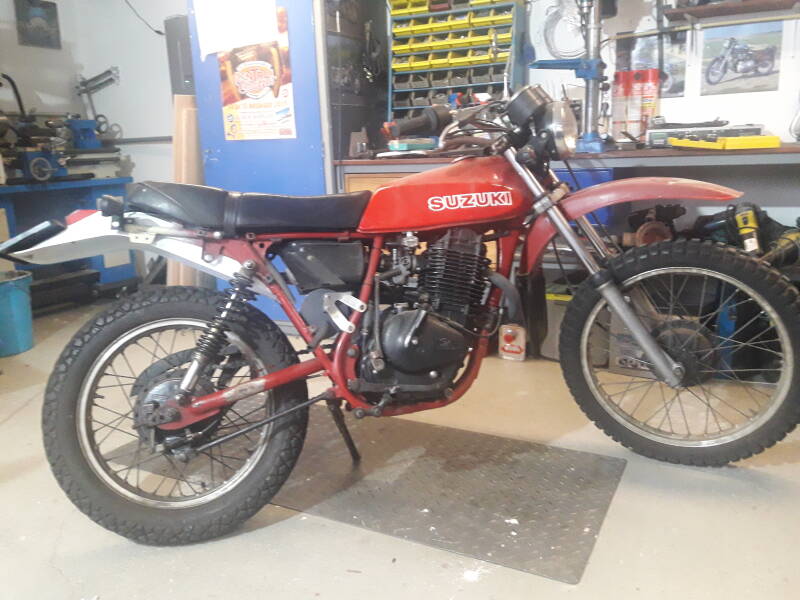
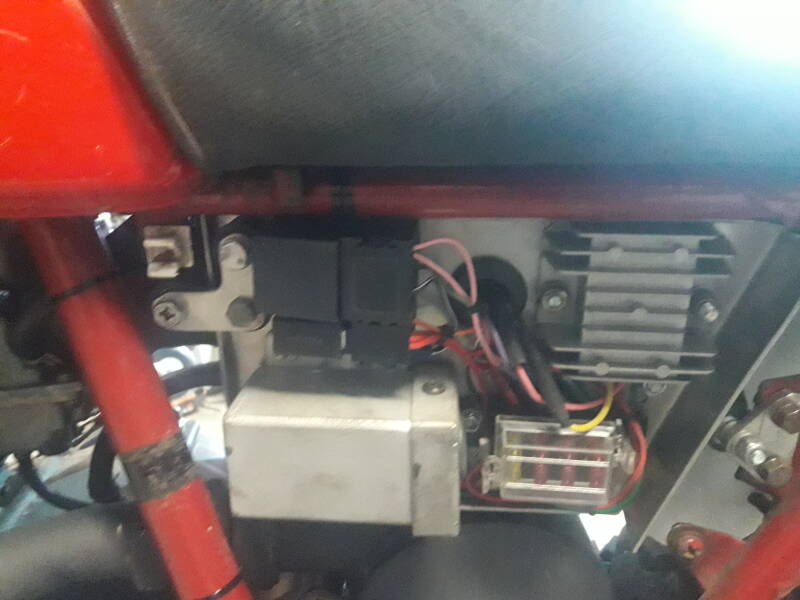
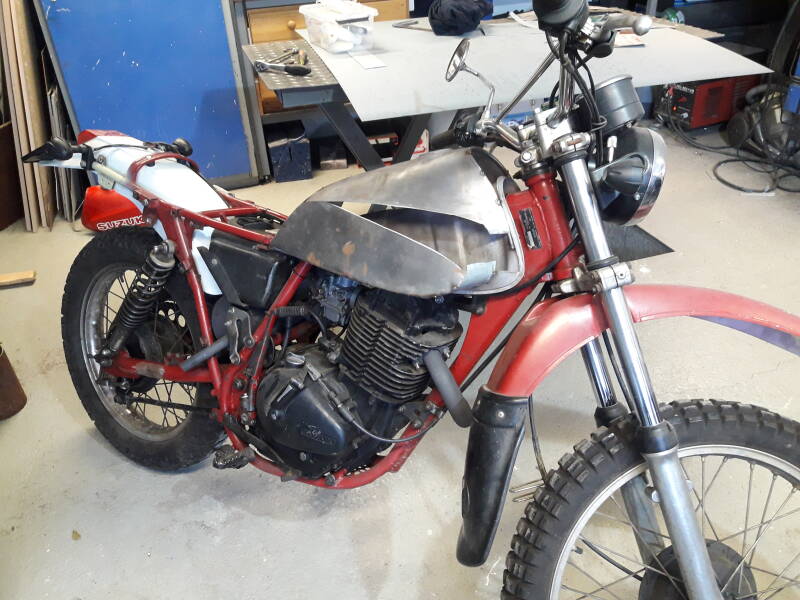
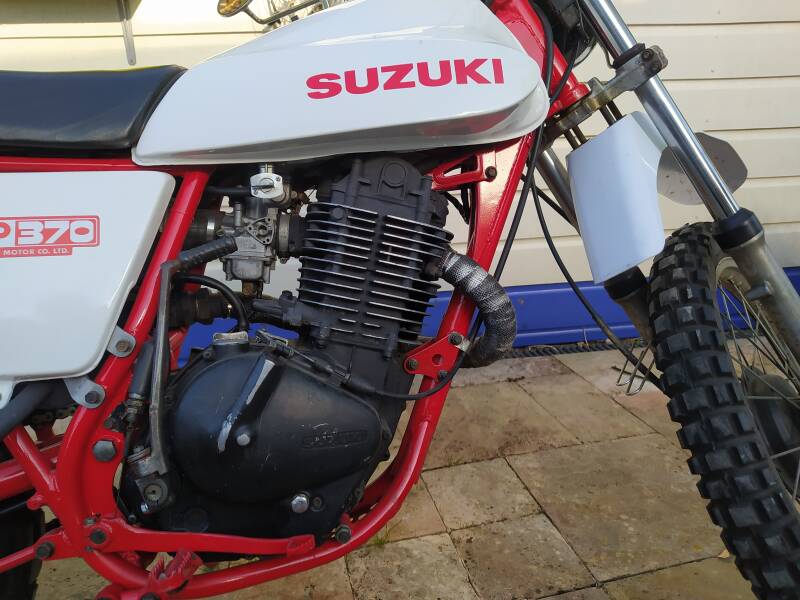
So after some sorting I found I had enough stuff to put together at least one bike. There was one frame with registration so I set to work with that and decided to go against my inclination to turn it in to a restoration project but put one together roughly first. Two of the three engines had a reasonable compression so I picked one of those and assembled a rolling "chassis". The wiring looms that came with the parts were a complete mess, therefore a complete new loom was needed. I decided to draft my own and convert to 12v in the proces. Left the ignition as standard, rewired the charging bobbin as a single one, ordered an Alibaba voltage regulator and 12v li-ion batterypack from a vacuumcleaner. All the lightbulbs were replaced for 12v leds and a little 12v claxon replaced the old one. Although I have not ridden big distances yet, I have done about 500 km's on it and it seems to be working just fine. It looks like this now;
Been riding around a bit and it's running sweet enough but something is not totally right yet because it backfires a bit and has a tendency of stalling on sudden throttle openings. Tried a few different carburettors and settings and it's getting better but we're not there yet. I'm a bit suspious of the ignition coil but I've only got one of these and am trying to find another. If anyone has any suggestions I'd like to hear.
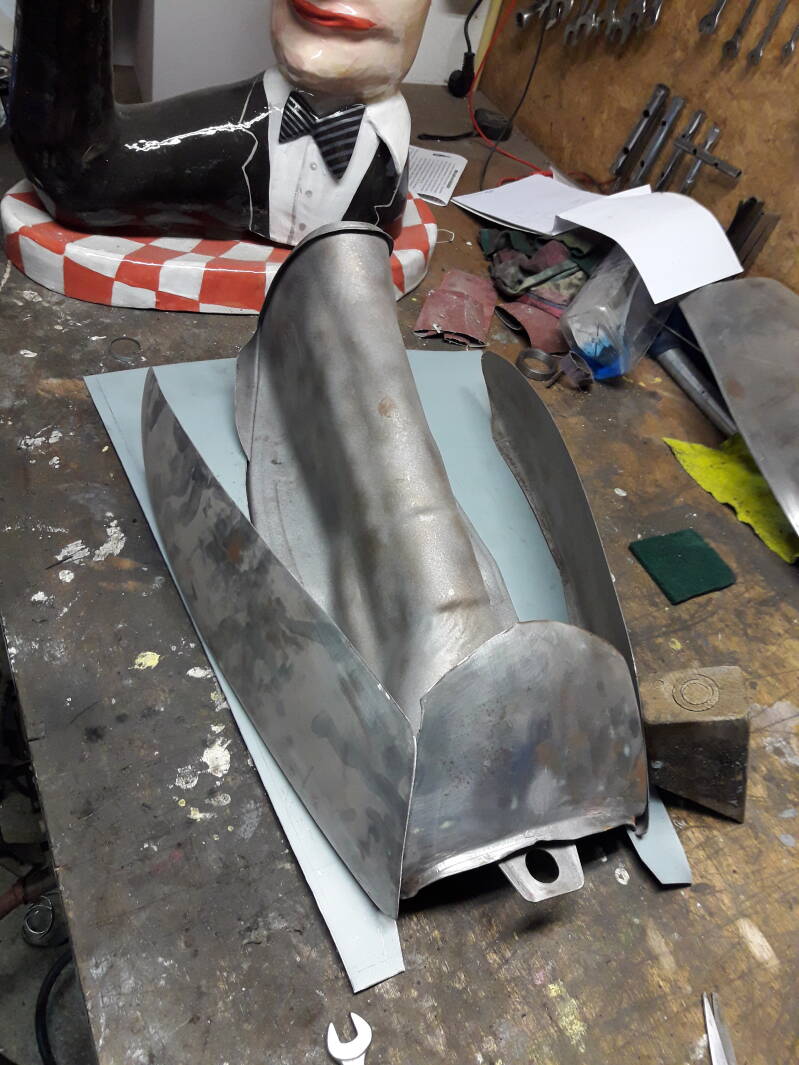
One thing I'm short of is exhaust systems. One aftermarket exhaust was supllied but that is butt ugly. New there is not a lot on offer. The only company I found that sold complete systems is in New Zealand and they look good and well made but were above the budget I want to spend on the bike. So I made my own;

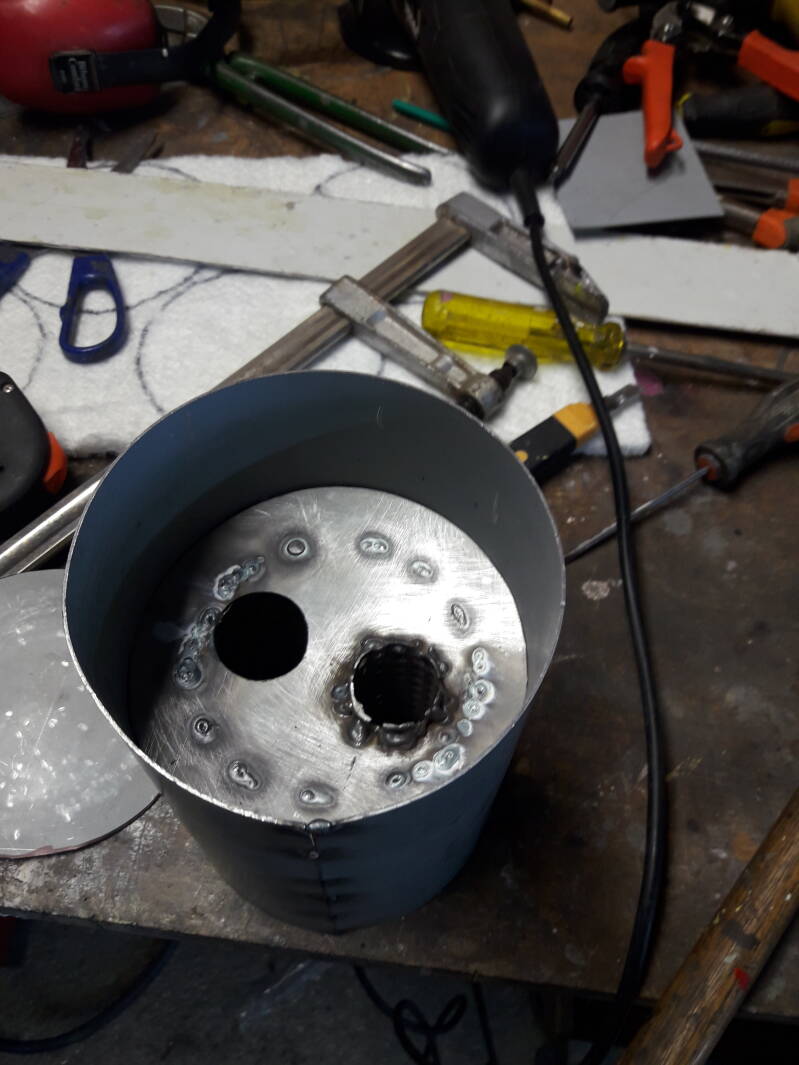
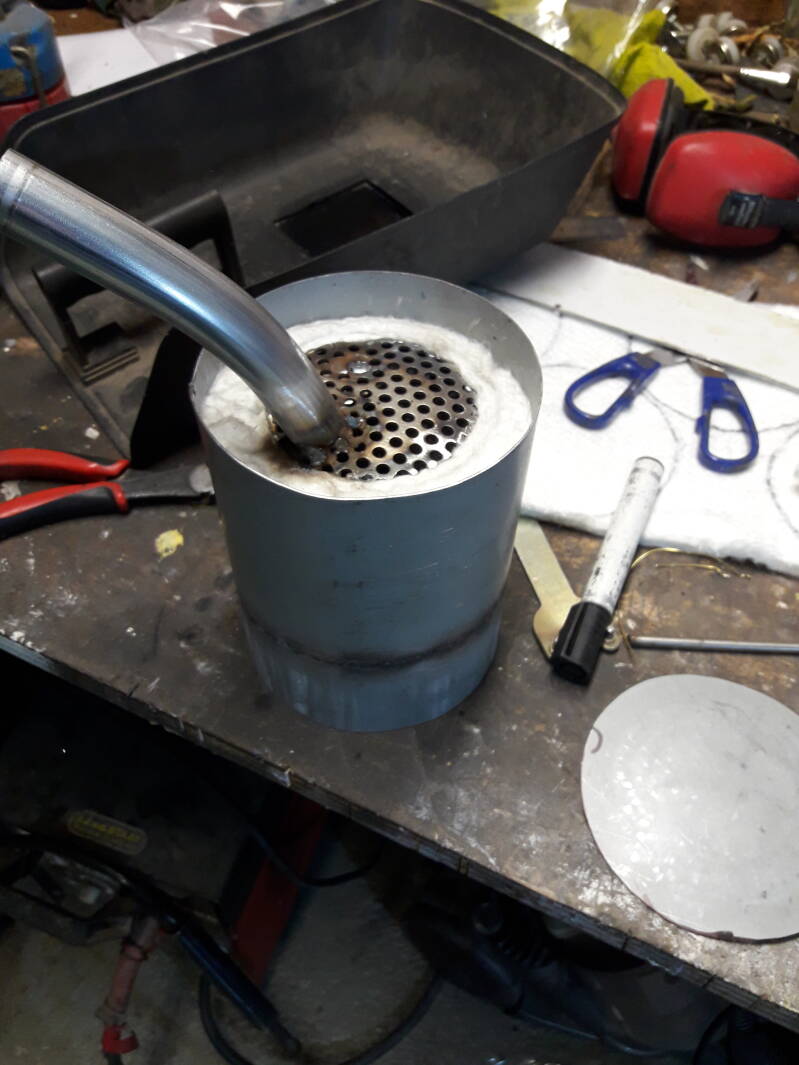
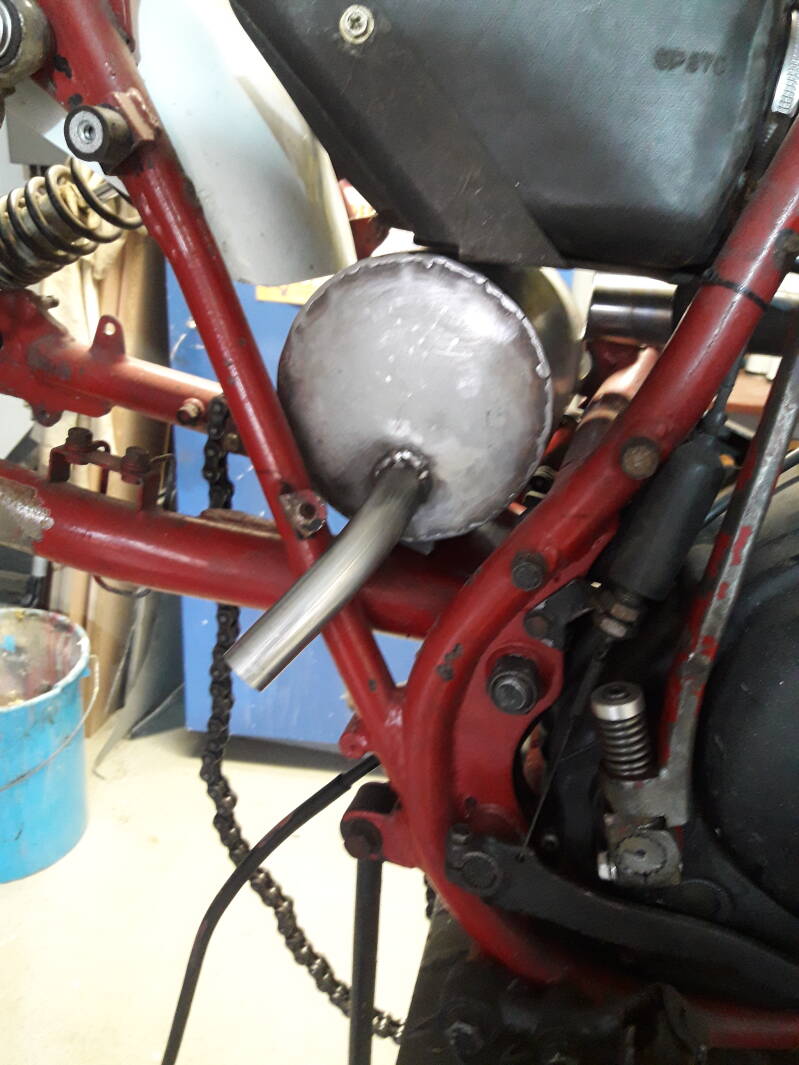
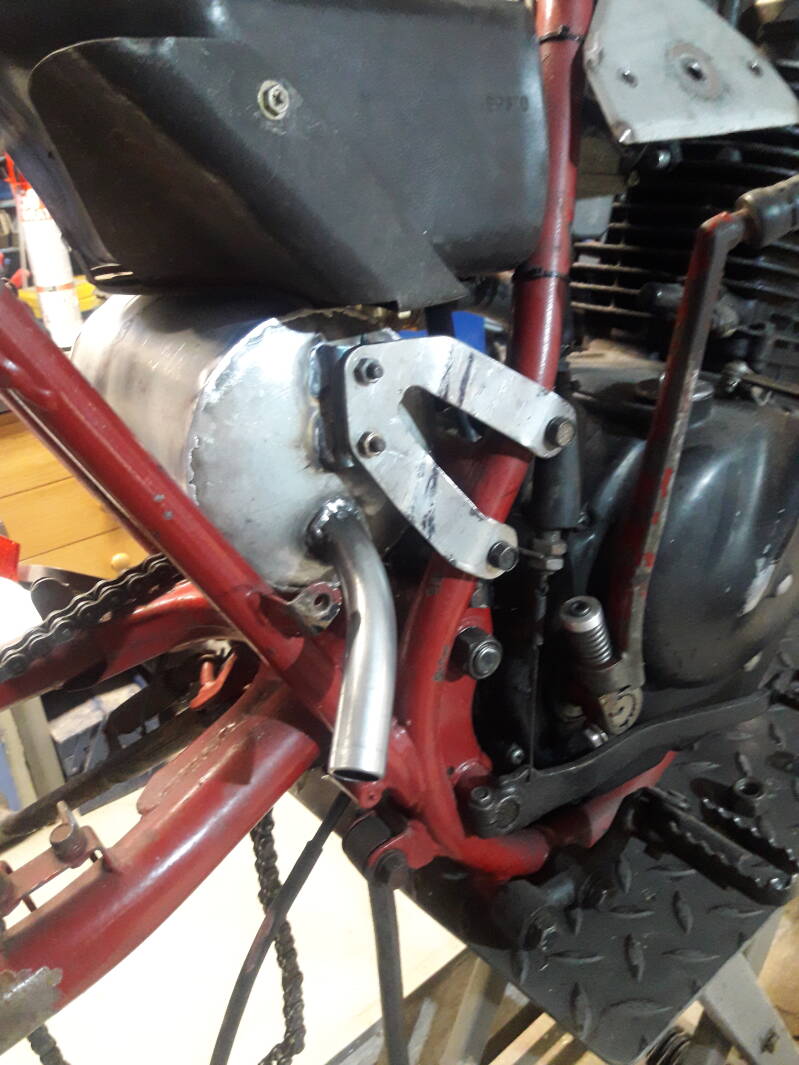


The idea i have now is to make two bikes, one special, to ride the trails of the TET, and one brought back to original as far as possible. This first will be the TET bike and I thought it would be handy to have no exhaust muffler sticking out at the back so taking luggage would be easier. So I tried to make a big as possible version of the "middle muffler" and it seems to be working OK. Noise levels quite reasonable (as in not too noisy! I dislike noisy motorbikes a lot, a lot of decibels does not make up for a lack of braincells!). The headerpipe was an interesting experiment. Having no pipebending equipment I scoured the net and found a lot of home remedies but nothing much usefull. There were a few clips however of elderly Yoshimura master craftsmen bending expensive looking titaniumlike tubes with nothing more than a big flame and an iron wire template in perfect curves. There was no explanation with the clips but I got some idea how to go about it. By the looks of it it was filled with sand and had what looked like a bolt sticking out of one end, presumably to extra compress the sand in the tube.
First I needed some tubing. The original tube is something like 33,5 mm outer diameter. So the closest thin walled tube I could get is 35mm central heating pipe. This has the added benefit it's quite affordable. So I machined a flange, welded it onto a lenght of pipe, filled with sand and started experimenting. As I only have a propane burner, which is not very hot, it was quite a time consuming proces. The first attempt failed, I heated the tube too locally and it was torn on the outside of the bend. But the second attempt went OK, as you see on the foto. It being heating pipe it was also possible to use a standard compression fitting to connect it with the muffler.
Next on the list was a larger tank. The original tank can hold 8,5 litres of fossil juice, which is not a lot. Should get you about 150km's down the road before the unease of possibly running out will kick in. So a larger tank would be a comforting feeling. There were four tanks in the lot, one of which was badly corroded on the inside. Perfect object to mess about with. The idea being making it larger without altering the '70 appearance of the bike too much.
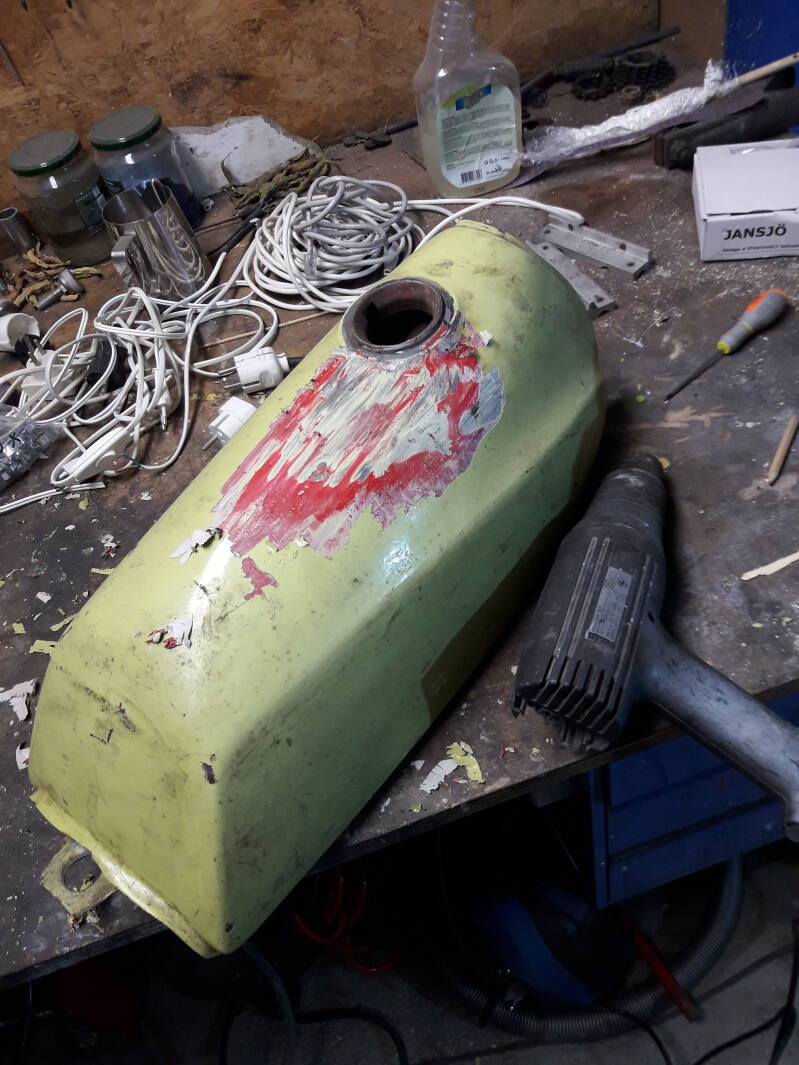

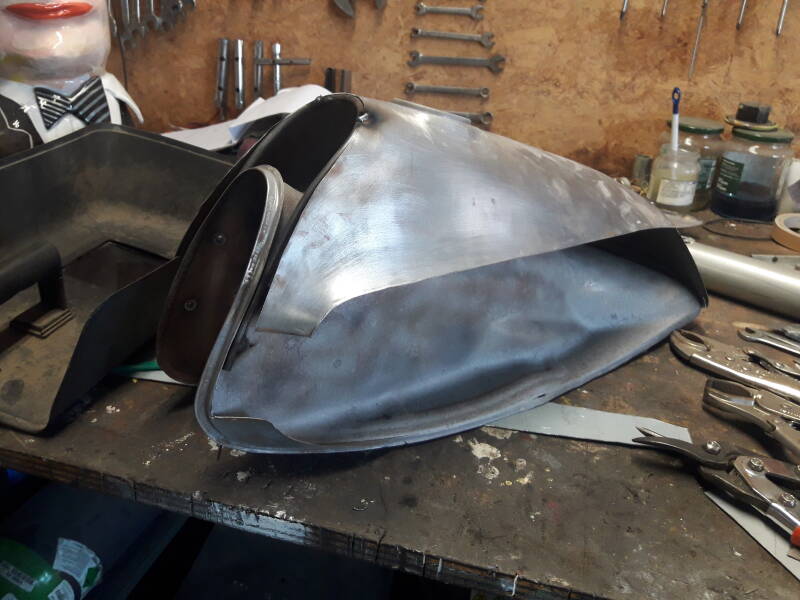


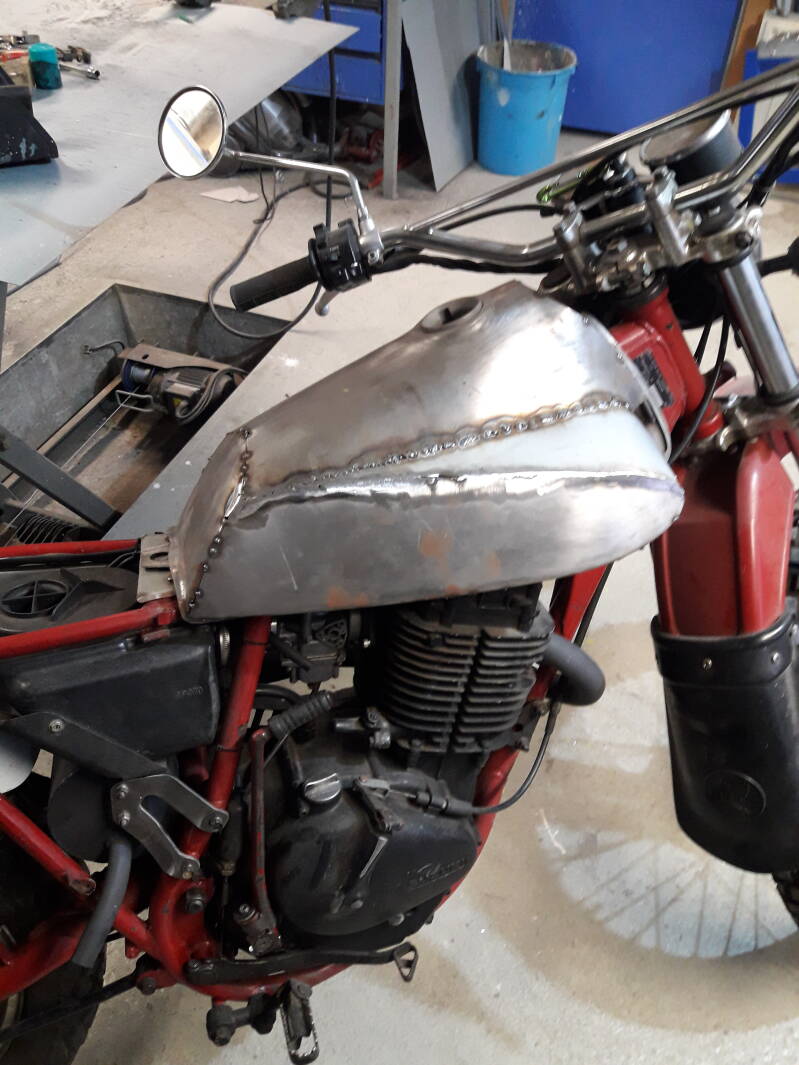
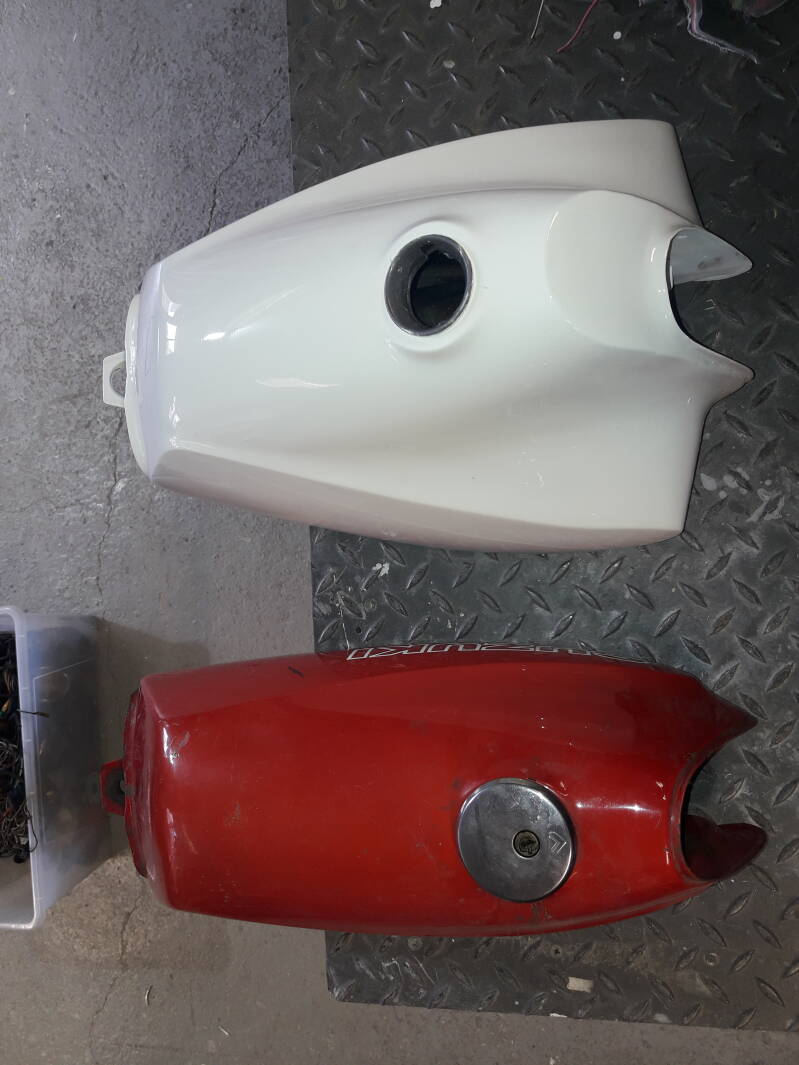
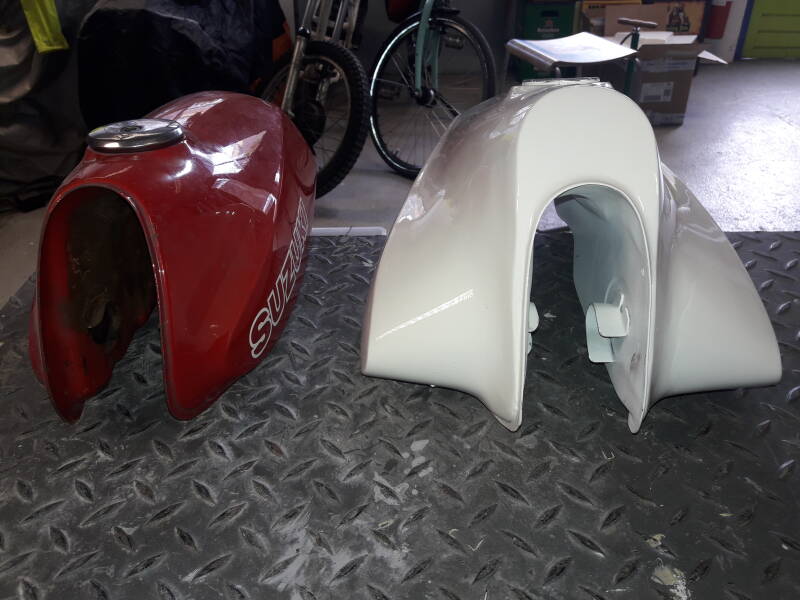
The SP370 tank has a distinctive shape because of the two "wedges" on the sides. So after cutting these out and sandblasting the corrosion away I moved these out at the front and moved the centersection up at the front. Then welded in two horizontal wedges and tidied the whole lot up. Truth be told, I did need some putty to smoothen things out but no excessive amounts. On the whole I'm actually quite pleased with the result.
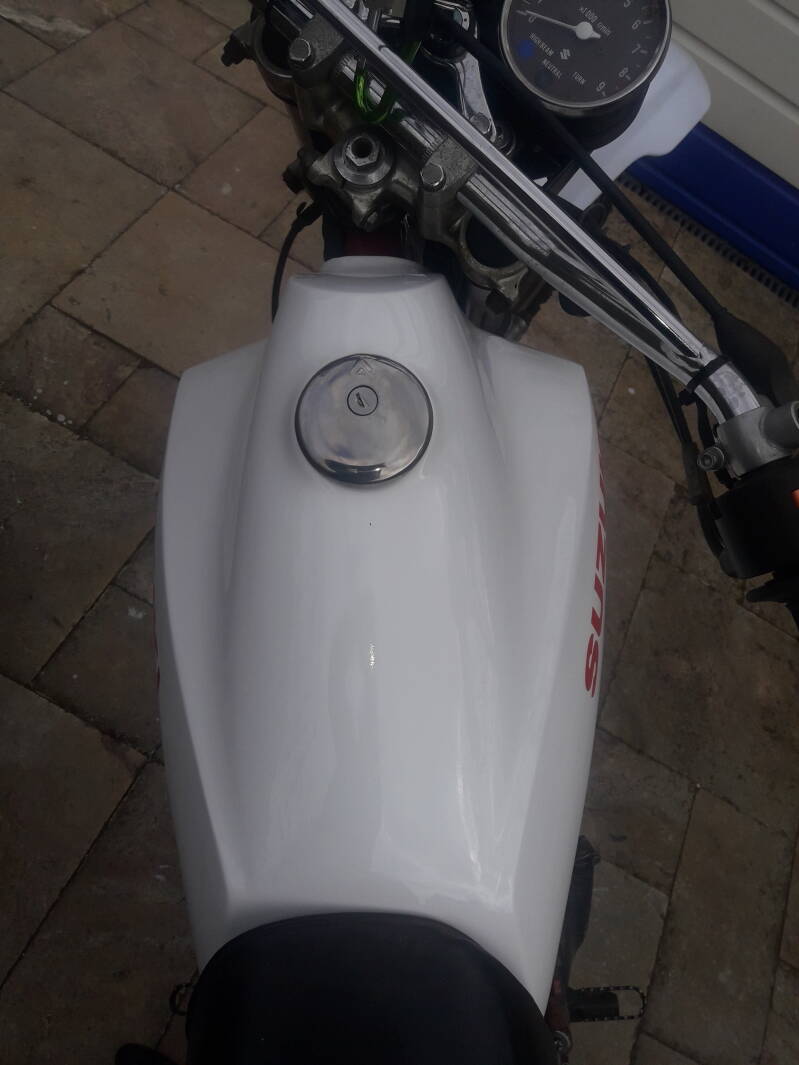
I then coated the inside with special epoxy resin and tested the capacity; 13,2 litre. Quite happy with that. I can't show the final result yet because I wasn't happy with the colour so it will need another coat of paint first.
Finished the tank today. Quite chuffed with it actually. Also changed the throttle valve needle in the carb. I have 3,5 carburettors and one of 'm had a different needle. It looked like it started tapering higher up than the others which should result in a richer mixture as the valve starts opening. Before the bike seemed to run better when I opened the choke a crack leading to believe that it was getting too lean a mixture. Now with the odd needle, no more backfiring or stalling on sudden throttle openings from idle. Hope it won't affect fuel economy too much otherwise my tank enlargement will be in vain....... :). Wonder which needle is the original.
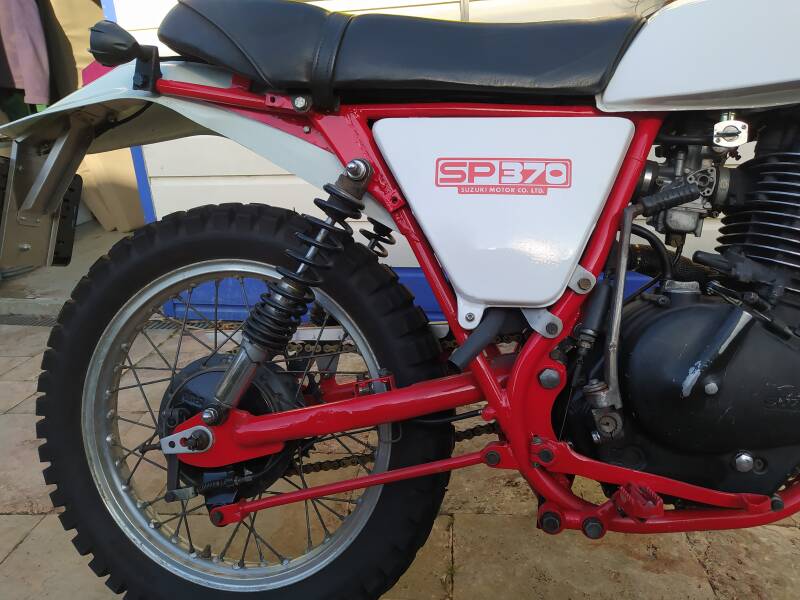
So then on to the next job. Sidecovers and rear mudguard. The plastic sidecovers, well I only had the righthand side one but managed to find a lefthander on Ebay, were both cracked. New ones are no longer produced and difficult to find so you may have guessed it; time for some more home produce. I did have a badly cracked rearguard, which would be suitable to make a mould, to make some fibreglass/epoxy copies. I figure that a good solid epoxy mudguard will be stronger than metal and less prone to vibration fatigue. So got as far as making the plugs and did create three moulds but made a beginners mistake of not making them thick enough which caused the gelcoat to crack. We'll have to do the excercise again.
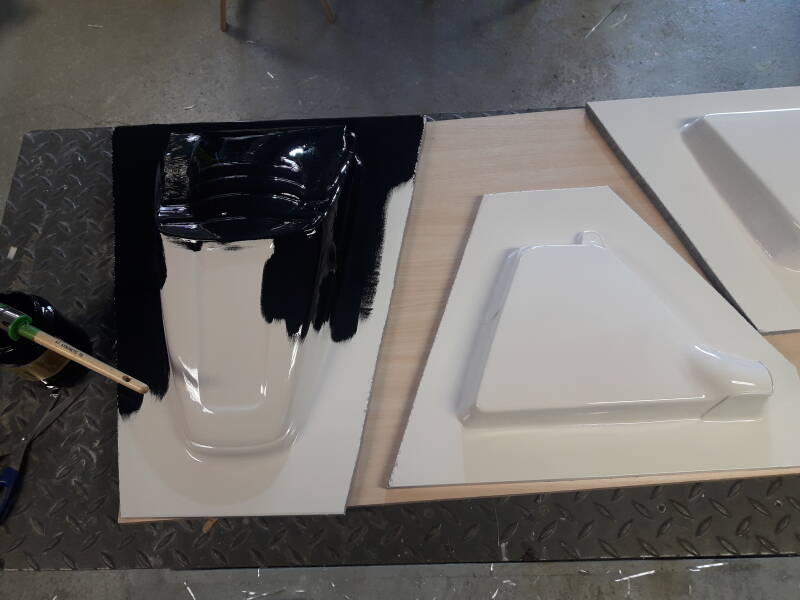
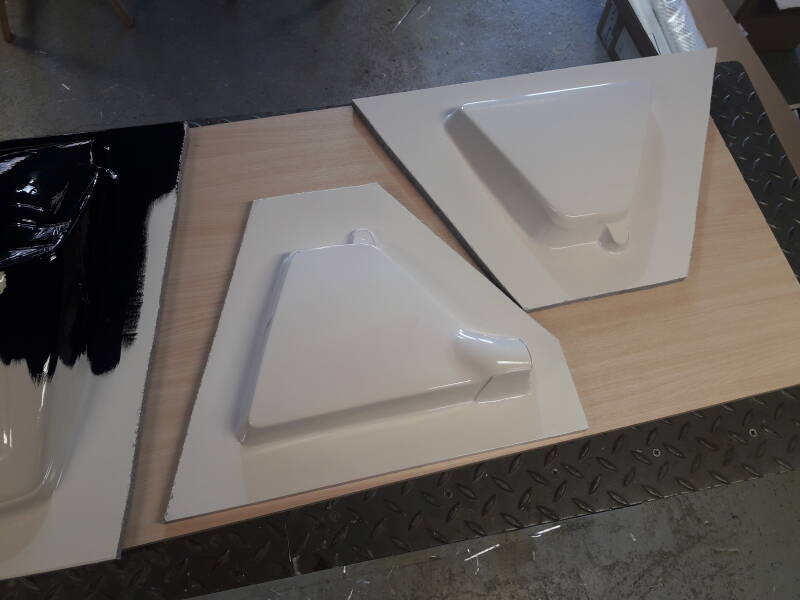
I've been a bit slack in the upkeep and the bike has been finished for a while. Anyway, the new molds worked okay and I made two sets of sidecovers and a rear mudguard copy. It took me quite a bit of experimenting, releasing the parts from the mold wasn't as easy as some youtube instructions showed. The answer turned out to be waxing, waxing and a lot more waxing. And with all this waxing I forgot to shoot more photo's. After that and spraypainting the new sidecovers and the frame I had some copies made of the SP370 logo placards in red. This was quite a satisfying job, bit of photoshopping the shots I took from the originals and after mailing the results to the printer, they arrived after a few days in the post. I think it finishes the bike off nicely. Final job was making a chainguard out of a piece of aluminium sheet which was left over from a previous project. This was quite straightforward.
The bikes registration was missing but I knew it was originally sold in the Netherlands. Getting a new registration wasn't quite as straightforward as I thought it would be as I couldn't show that engine and frame numbers originally met. The Suzuki importer, where I enquired did not have any records left of that period, or so they said. You'd think that the authorities would still have those, as they thought this important. They let me know that they would have to investigate, which could take up to two months. So after waiting for two months they told me they'd given up and registered the bike with the current engine number.
So the big moment of the first testride was there! And it went well! Really took me back in time to the days I rode my XT around in the beginning of the eighties. It has a similar feel and sound. Free revving and vibrating the little engine nimbly took me rapidly through the gears to a fairly comfy eighty kph. Above that, it'll do 120, the good vibes disappear and the motocross tires start to feel a bit floaty.
The only snag was starting the bloody thing. It lacked the valve lifter I remember from the XT, so finding the right point to kick was tricky. And it didn't start well. My guess was that the spark was too weak. So I experimented with a car battery and coil and that seemed to work a whole lot better. Bike started up easily, warm or cold. Maybe the magnets in the flywheel had weakened too much over the years to produce a decent spark. I had another flywheel but that was just as old. So I decided to convert it to battery /coil ignition. Purchased a 12v motorcycle coil and considered installing electronic ignition. Eventually I skipped the ignition which was not readily available for this bike but I did install a standard transistor module. Then I could leave the original breaker points installed but they would wear a lot less. Also it should produce a stronger spark. However there was no room to put it. The only space available was inside the air filter. And as the instructions told, it had to be installed in a well ventilated environment, that seemed an obivious choice. And it works like a song! Bike is very easy to start now. A few times it sprang to life (warm) already when I was just trying to get it over top dead center to find the spot to kick!
Here some shots of the finished product;
Maak jouw eigen website met JouwWeb