2015- 2018 Laverda 750 SF
The Bike
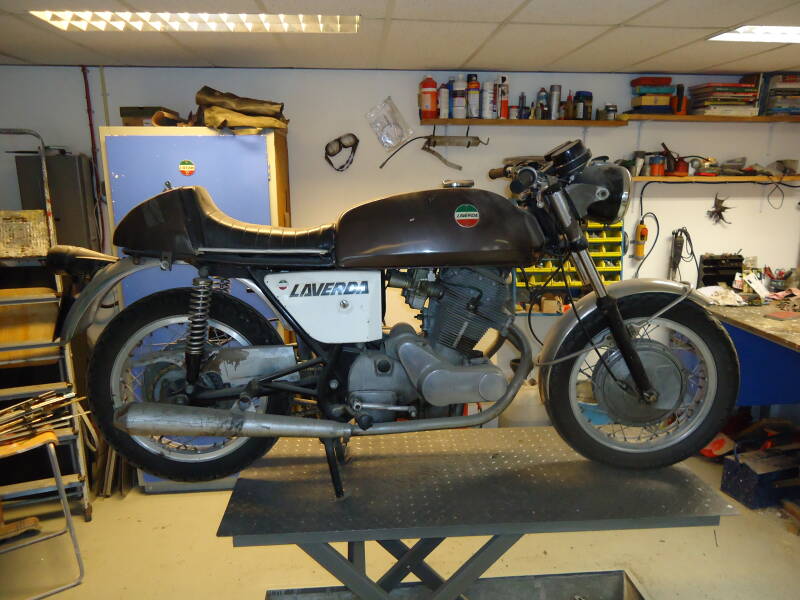
About the bike. It was advertised on an early version of "Marktplaats" the favorite Dutch second hand site around 2005. The guy I bought it from was selling quite a few Laverda's at the time but seems to have disappeared from the scene nowadays. When I went to have a look he had about 8 of them stacked in de garden shed behind his parents house. The story was that he was selling the collection of two eccentric Belgian farmer brothers who had amassed a large amount of Laverda bikes in the 70's and 80's in the basement of their farm.
Whether this is a true story I have no way of verifying but the bike did carry a Belgian registration. Furthermore it also came with the copy of an older Italian registration which informs us it once must have been stirring things up round the town of Cellamare, near Bari in Southern Italy.
Anyway, when I read the ad, it brought back memories of the second motorbike I owned after I got my license in 1977, which was a 750SF also. And as I was approaching 50 in 2005 I was getting nostalgic inclinations not unlike a fair few of my contemporaries, if the success of vintage bike shows and meets is anything to go by. So I couldn't help myself and got the thing on the trailer.
It was in a sorry state cosmetically but mechanically sound according the seller, although there was no way of checking other then turning the crank by hand. No chance it was going to run anytime soon. So I closed the deal and the bike ended up in my dad's workshop, which was completely empty by then, my dad having retired.
Great! You may think, good place to work, get going. But no. Finding a "project" is one thing, actually finding the time for it is something else. So it ended up in a corner, where it was forgotten again, like it probably was by the previous owners.
So it wasn't until 2015, when my parents moved into an apartment, it resurfaced and ended up in my own shed behind the house. No getting away from it anymore, time to get a move on.
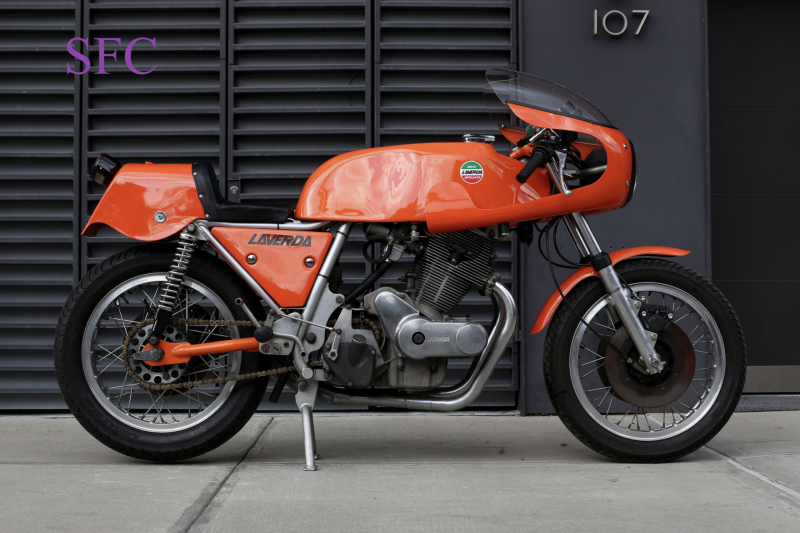
Laverda 750 SFC racer
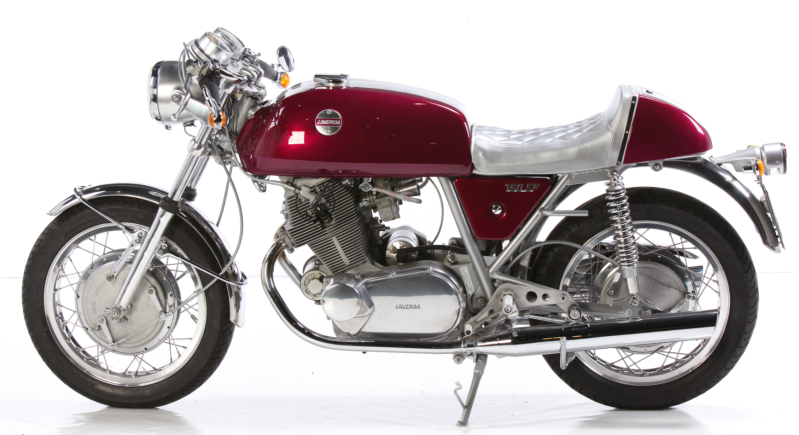
Stock 750SF

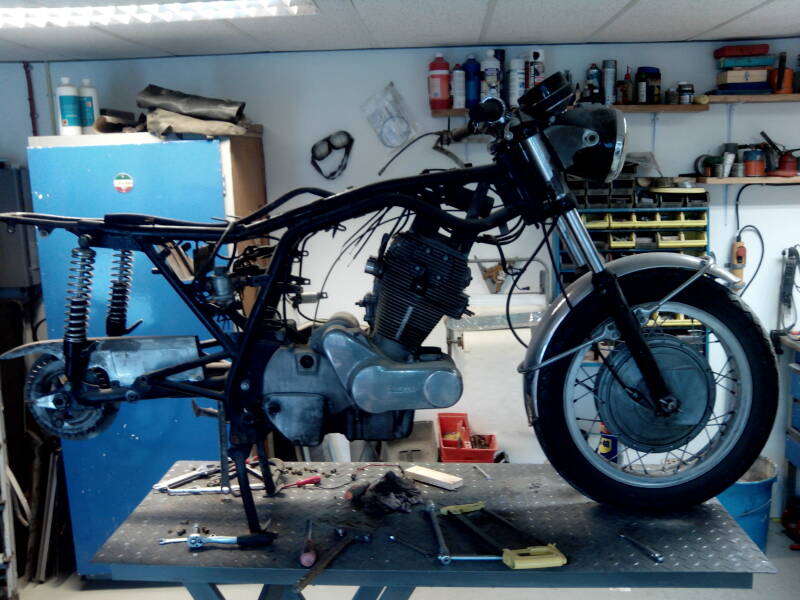
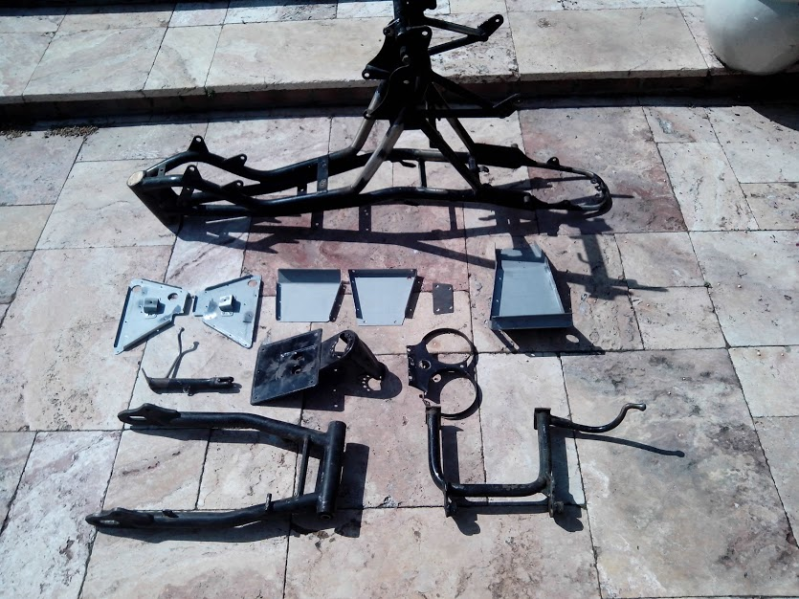
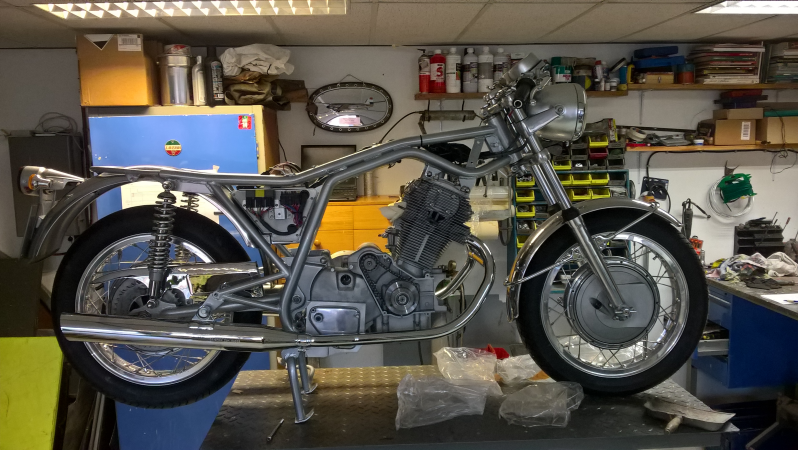
Stripping
So where to start? I considered getting it to run first to see if it would but decided not to. Since I had no idea what the condition of the innards was, there was a risk of doing more damage then there possibly already was. So descision was made to take the thing apart and leave the engine for later. So cleared up some shelvespace and got going. This was the easy bit.
What's next?
While taking everything to bits there was a bit of time to think about where I wanted to go with this project. Was it to be a restoration back to original? Of course the SF is a great looking bike in its stock livery but I actually wanted something a bit different. Growing up in the seventies of Dayglow and Glamrock I'm partial to a bit of brightening things up. The Laverda was at the time definitely not the most colourful bike on the road. I can remember especially the Japanese makes had some nice candystick tones. Even dull BMW had a bright orange R90S on offer! At the time I rode a Yamaha FS1 moped in Popsicle Purple and for me that colour fits the nostalgic 70's picture exactly! To compliment it I thought a metallic silver gray would be nice. Makes a change from yet another orange SFC lookalike.... Mentioning the SFC, what I do like about this model are the smaller sidecovers exposing a bit more of the fantastic frame. Decided to go for a subtle caferacer look keeping as close to the original as possible.
Side covers
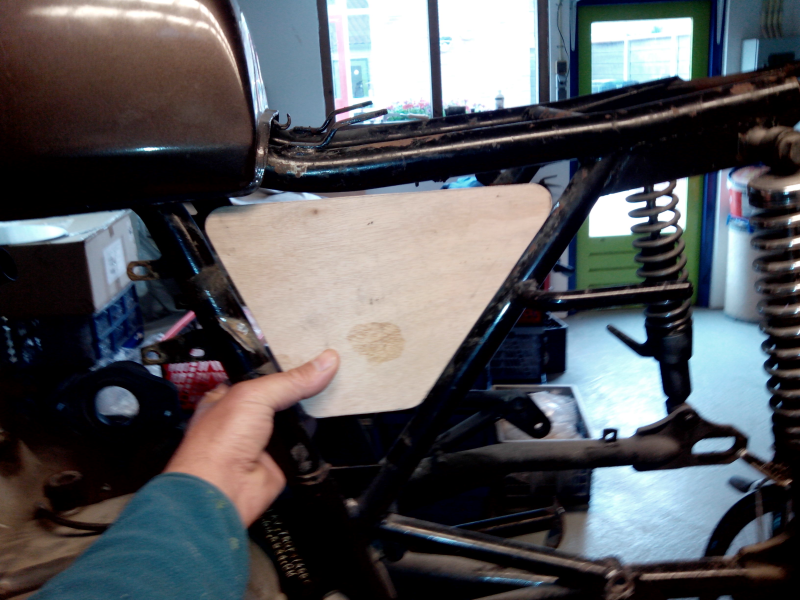
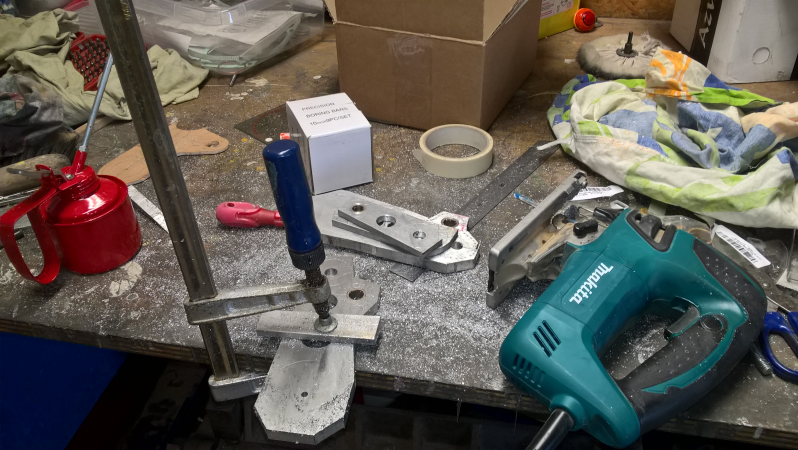
I thought it would be smart to make a start with the side cover idea before taking the bike completly to bits to see if it would work out and if I would have to make some alterations to the mounting brackets on the frame. The original battery and tool compartments and covers were removed and a few MDF templates made up. Making new sidecovers out of fibreglass seemed to be the easiest option but that turned out harder then I thought.
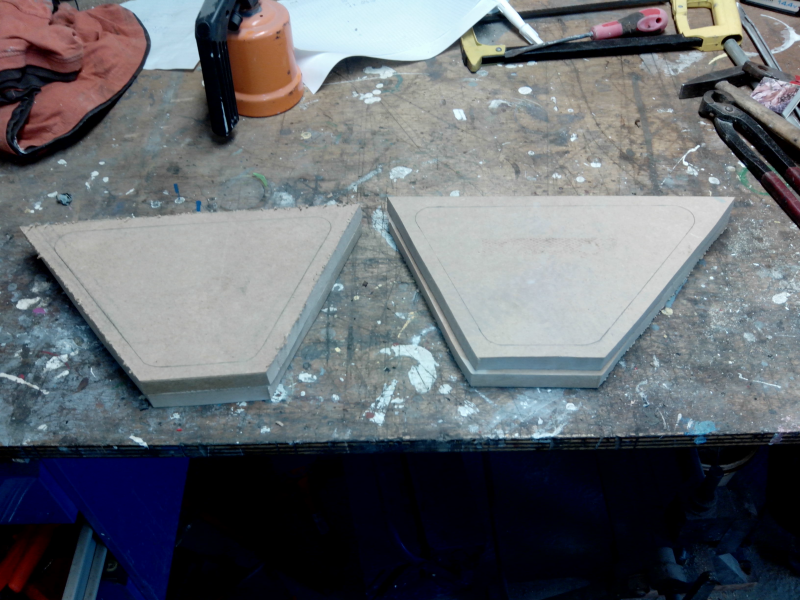
So after a few exercises with a jigsaw, a rasp and 25 meter of sandpaper I ended up with a pair of pretty decently shaped sidecovers. I also made an indentation in the middle so the original fastner knobs still could be used.The only problem was they were solid MDF blocks...... So to translate them into fiberglass first a few moulds would have to be created.
The moulds themselves could be made of fiberglass too of course. After ordering a sufficient quantity of mat and resin I sprayed the templates in 2K and applied a good layer of fiberglass. Having no previous experience with the stuff I ended up with an inseperable block of glassfibre coated MDF! No way could I get the templates out without knackering the moulds completely. So after some language in Dutch I won't repeat here in case some of you understand it I let a suitable amount of time pass to come to terms with the failing project. Meanwhile I discovered where I went wrong and having collected more knowledge and a bit of Dutch courage repeated the whole proces. This time the templates did come away from the moulds so I could finally produce the covers.
On the foto's below you can see the moulds and the final products. I also made a copy of a CEV headlight housing but later on decided to use the old style Bosch headlight after all.
Making the templates;

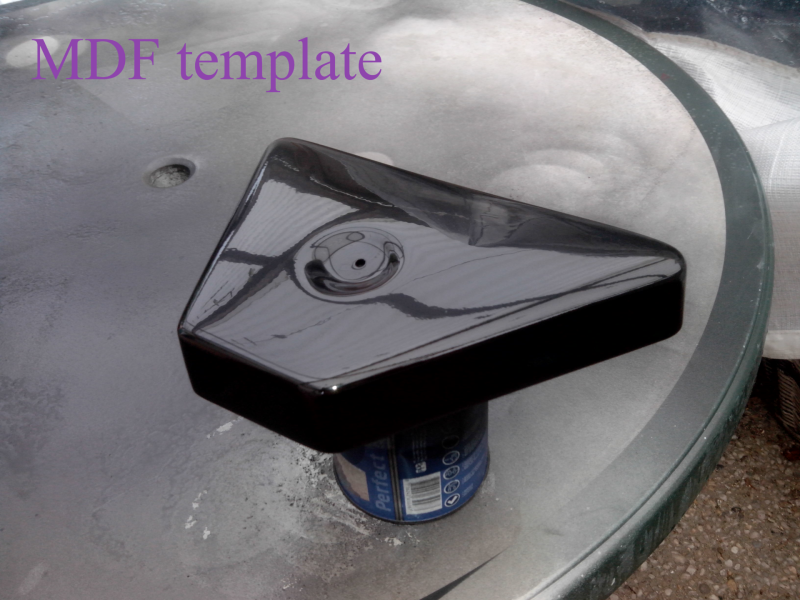
Making the moulds;
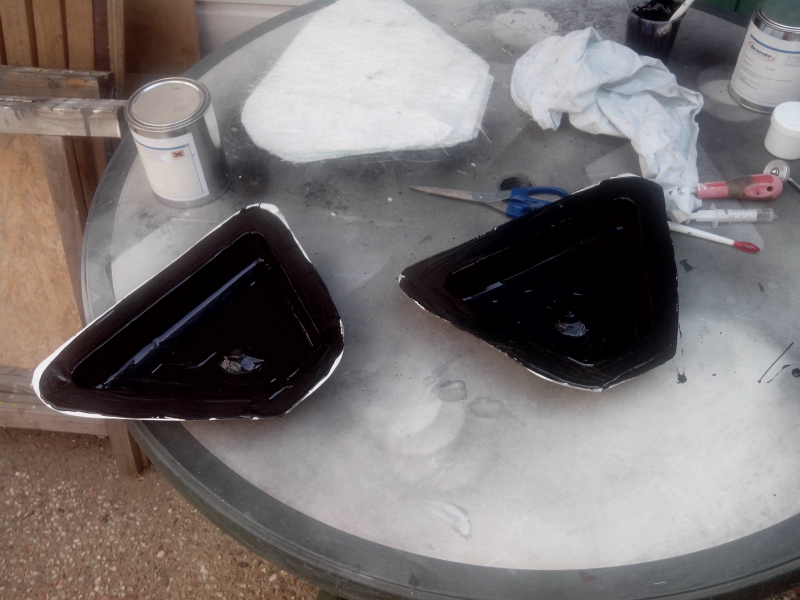

Finished cover

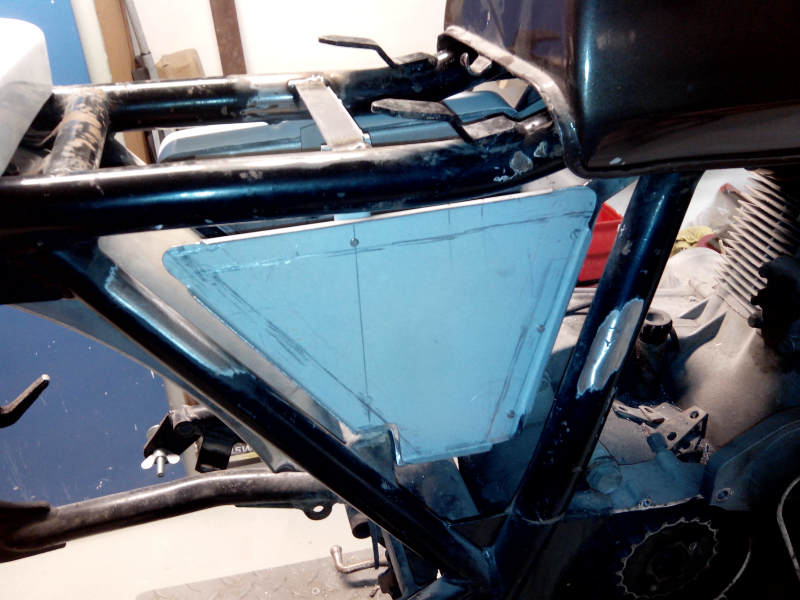

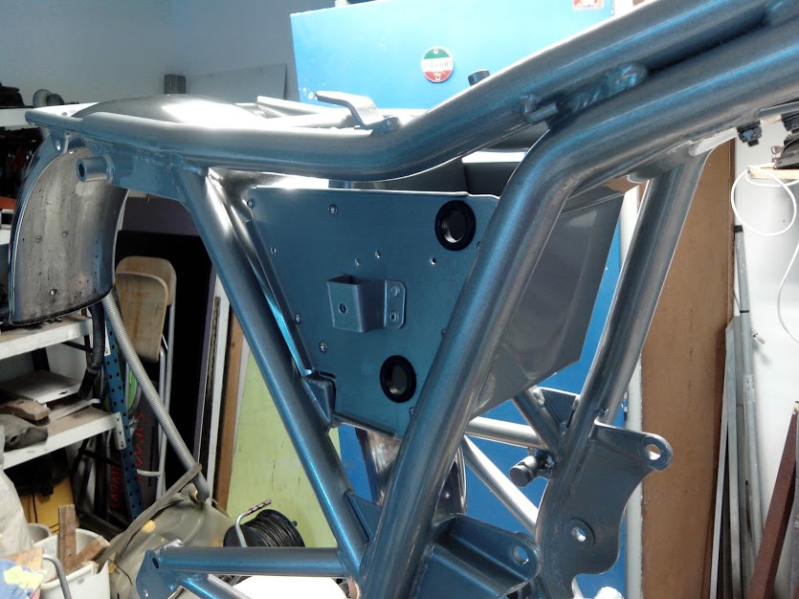
Electrical system
The wiring on the bike was a mess as was to be expected. Decided to start afresh and design a completely new loom, incorporating an electronic regulator, electronic ignition (both from bike electronics wizard Hans Beck from Delft) solenoid controlled lighting and a lithium ion battery (smaller, lighter and better suited to long periods of disuse over winter and Hans, it works a treat with your regulator!). All of this needed to find a space on the bike behind the newfangled covers. So a first a new housing was fabricated out of zinc plated steel sheet.
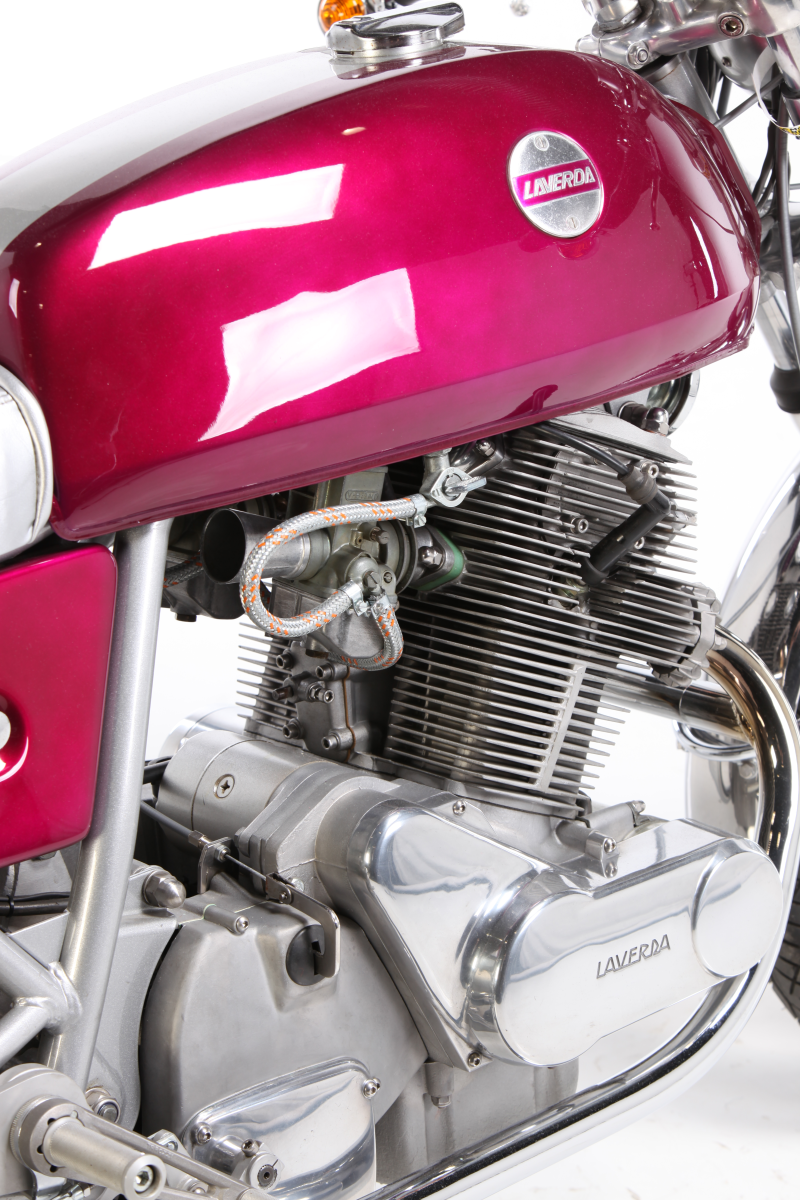
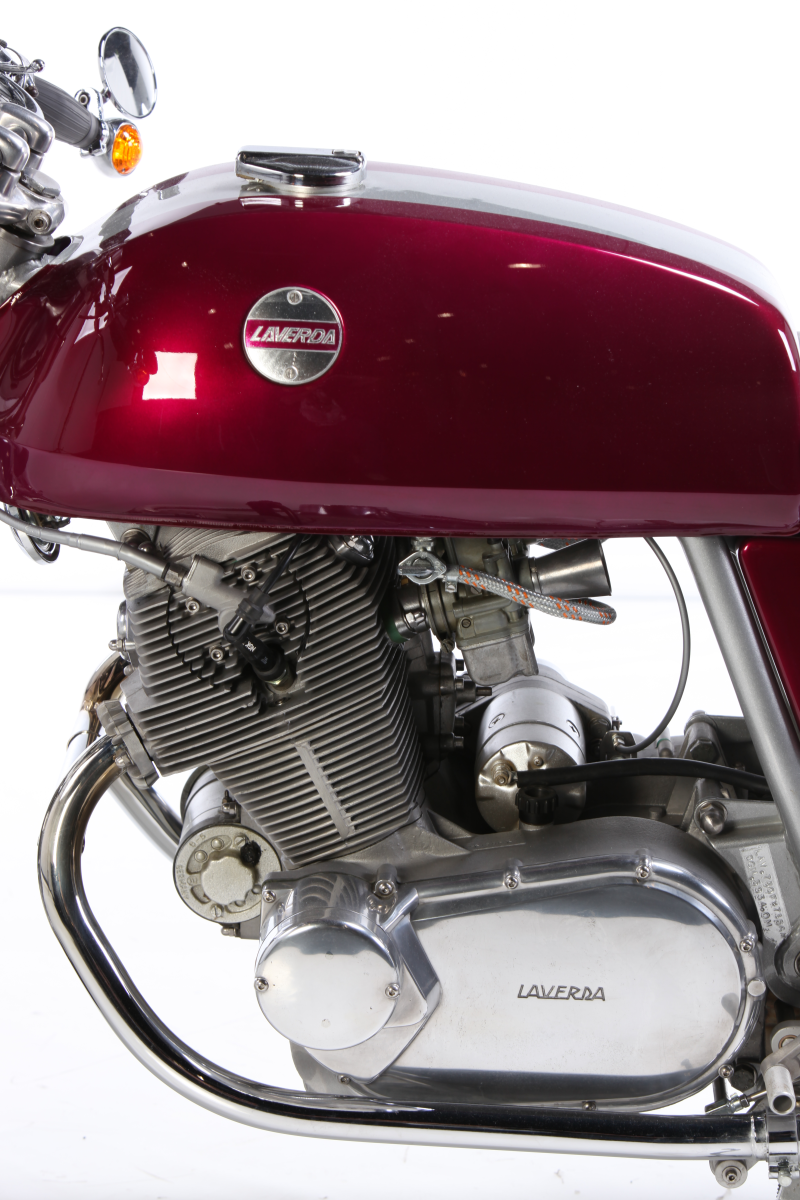
No need to bother to find a place for the airfilter because being an early model she breathes the open air through a pair of nice aluminium trumpets.

Painting, coating and polishing.

While it was nice to have all the coating and spraying done by the profs I felt I coulndn't miss out on all of the nitty gritty stuff so started on polishing all the alu bits. Which was a hell of a job as it turned out. The lower forks were black and I actually wanted them polished shiny alu. So stripped off the black paint and underneath found a thick layer of filler which covered some very roughly finished alloy! So all of it had to be sanded down with gradually finer grades of sandpaper and ultimately polished. The fork yokes needed a similar treatment.
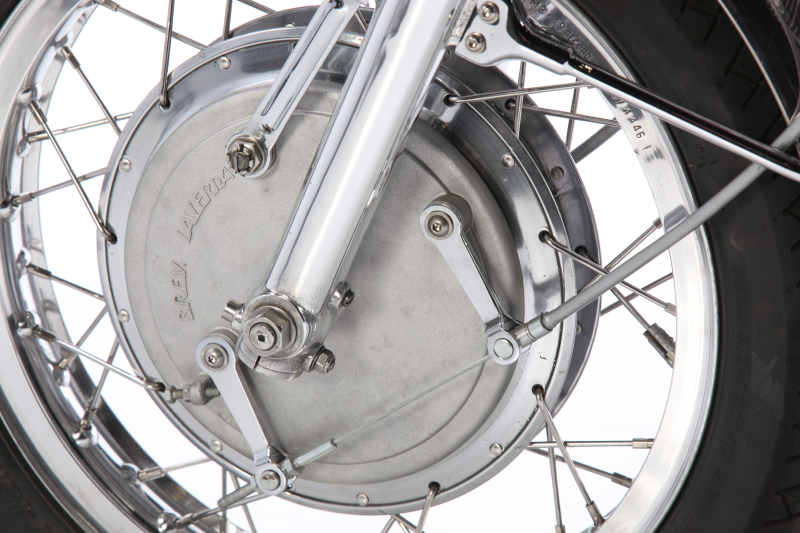
Then the wheels had to be dismantled, rims and hubs polished and respoked with a set of lovely shiny stainless spokes.
By the time all the stuff came back from spraying and coating I was so sick of polishing I decided to put the engine covers off till later.
Next on the agenda was the general facelift of the old bird. Some ungainly and now unnecessary brackets were removed from the frame (but kept and stored of course, just in case) and the whole lot, frame, rear fork, stands etc. was sent up to be sandblasted and powdercoated in a nice sivermetallic finish.
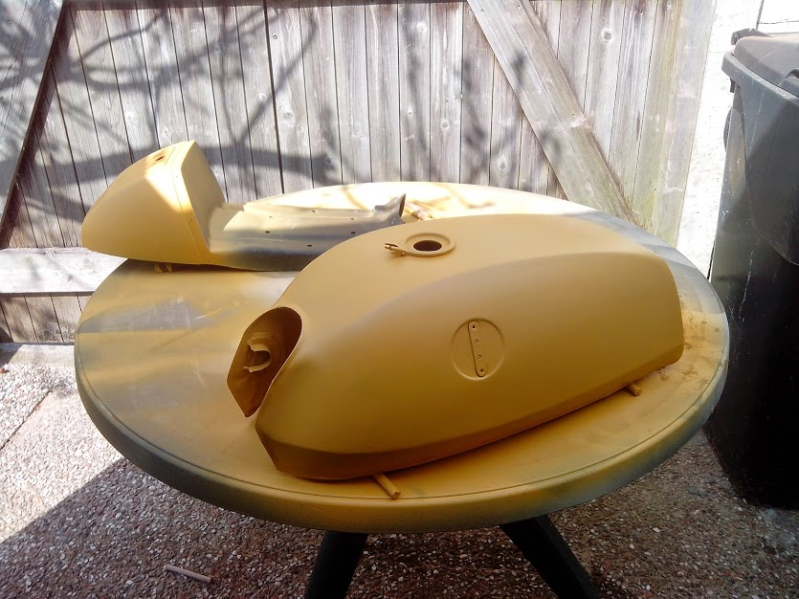
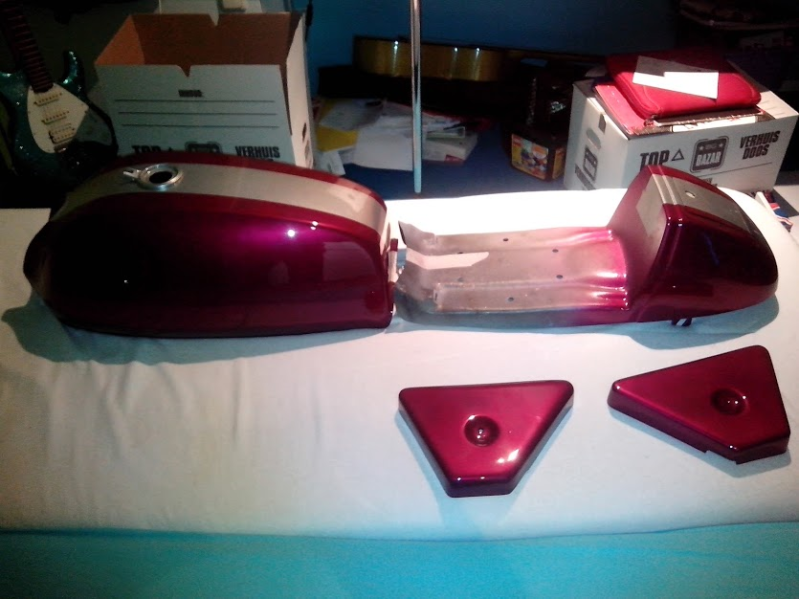
Next the tank was stripped. Appeared to have had about 5 different colours during its life of which the bottom one looked like a metallic red. Never seen a red SF but maybe there were. But the good news was, no damage hiding underneath! Well save for one little dent. As the inside was very dirty and had a bit of superficial rust it needed cleaning and after a derusting treatment was coated with special epoxy resin.
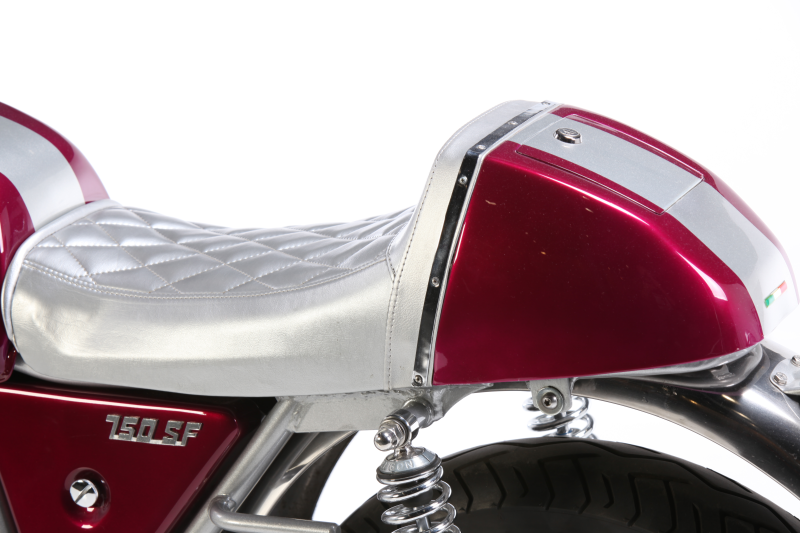
The seat was in very poor shape but luckily I found a very good replica on an Italian website (Kijiji) for a reasonable price. After priming the tank, seat and covers were sent to the spraypainter for a nice coat of Popsicle Purple! Which is a tricky colour to do apperantly but turned out very nicely.


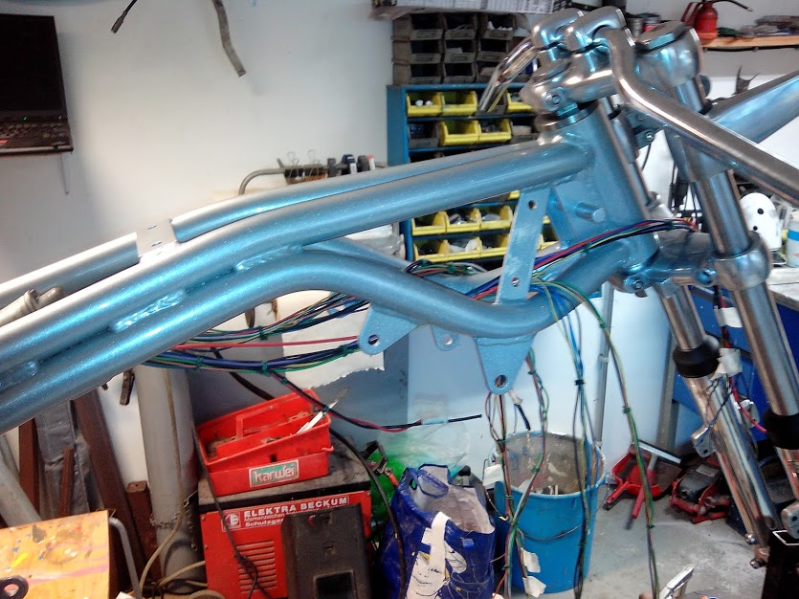
Reassembly
Seeing I still had a fulltime busy job at the time, everything took some time but after about a year and a half I reached the stage I could start putting some things back together. The aim was to put everything back together besides the engine. This reduced the risk of loosing things and cleared up some space. So after putting in some new headstock bearings and rear fork bushings I put the rolling part together as much as possible. Of course this was one of the nicest bits of the project so it did not take very long. Most time consuming being completing the wiring.
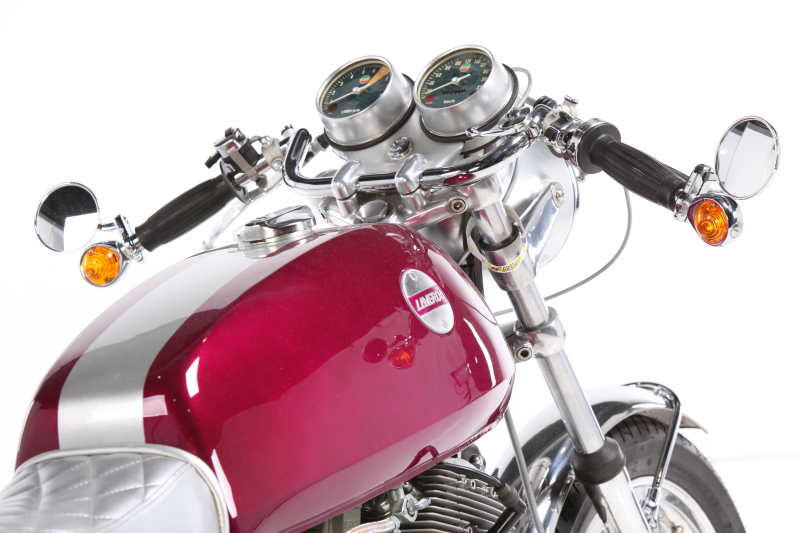
Some other things that were done were a modification of the headlight and having a number of items rechromed. The headlamp that was installed on the bike was the old style bosch type with an obsolete ignition switch and indicator lights on top. This switch was used in the very first models with the Smiths instruments. But mine already had Nippon Denso's installed, with the ignition switch mounted between the counters and the indicator lights inside the counters. Laverda produced the bikes for a while with the old Bosch lamp still installed untill it was replaced for the more modern plastic CEV unit. I actually like the old Bosch "egg shaped" lamp better but the switch and lights bothered me. So they were made to disappear!
Croming is an expensive business but luckily there wasn't that much of it to do. Handlebars were new, a new exhaust system was delivered by mr. Bovee's Italian contacts in part exchange for the original side covers. Thank you Ton! The old mufflers on the bike were the "megaphone" type and were beyond salvation. I personally favour the "slashed" model which were on my SF back in 1979. So the rechroming was limited to some brackets, footrests and levers, the largest item being the chainguard. Furthermore the polished hub and rims were reunited with some nice new stainless spokes.
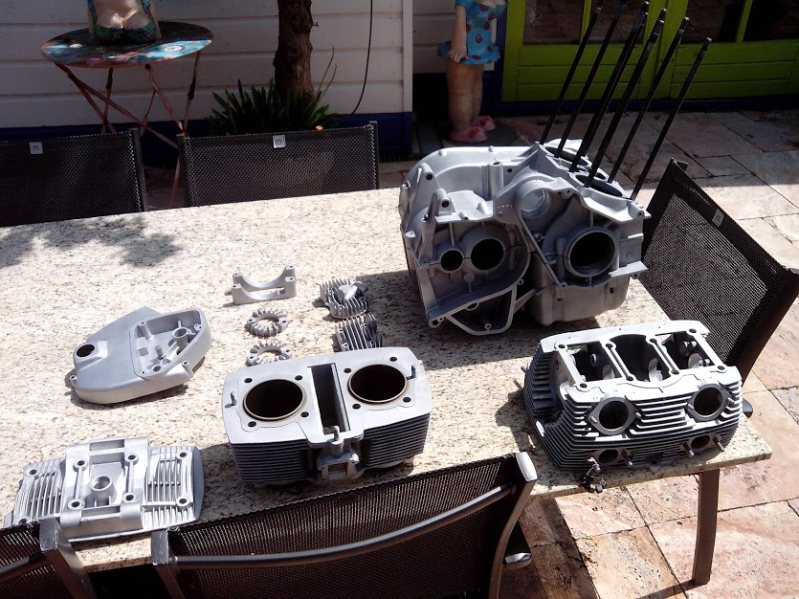
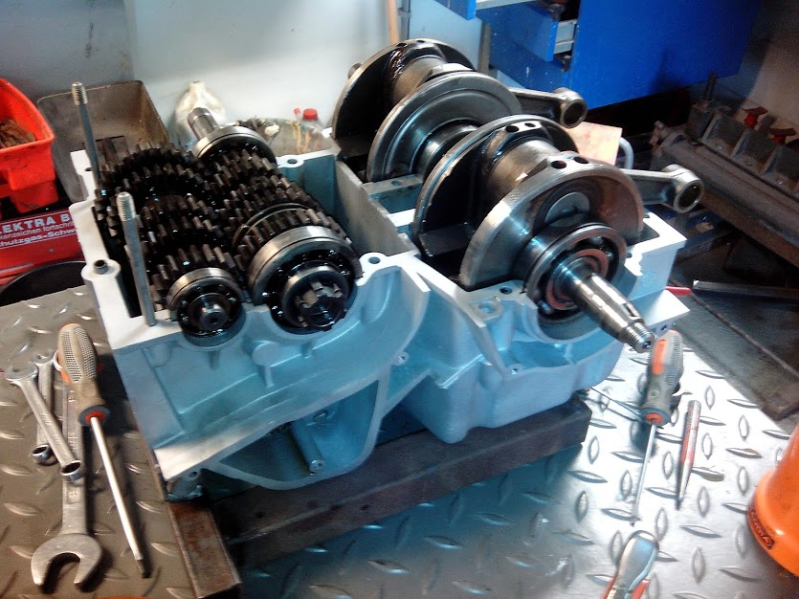
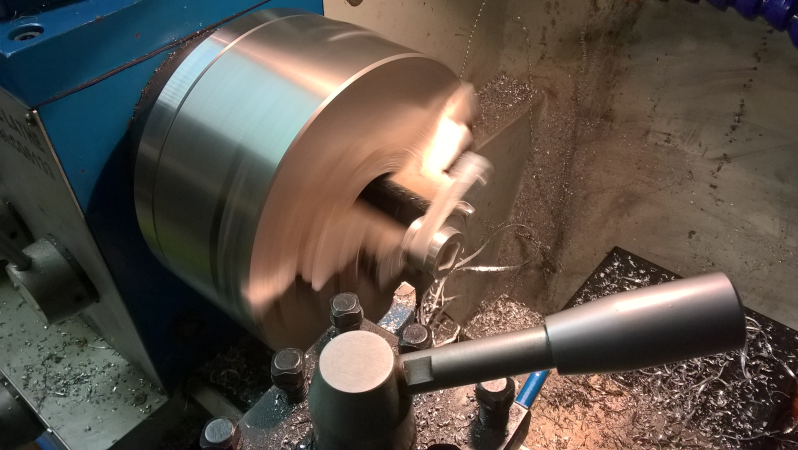
Engine
With the rolling part assembled it was at last time to focus on the engine. I fabricated a mount to put it in to make working on it a bit easier. So with some trepidation and a good look in the manual I started taking it apart. It turned out to be fairly straightforward and a lot simpler than some bikes I had worked on in the past. 1972 Triumph Trident to name one..... And it actually turned out to be in quite good condition. Removing the cilinderhead revealed a lining which hardly showed any wear. The honing marks still clearly visible. Actually not sure if honing is correct english....means honey in Dutch, hmmm. Anyway, you get the drift. Crankshaft bearings looked happy. So the seller was right after all and it seemed mechanically healthy. Could it be that the odometer reading of about 20,000 km was correct?
So what I did, because it was apart now anyway, was replace the gearbox bearings, oilseals, gaskets and installed modified primary and camchain tensioners as advised by Laverda guru Gijs van Dijk. Also had the local overhaul company West End freshen up the valves and seats. The crankcases and other external parts were wet glassbead blasted on the OUTside only. Then put the whole thing back together again. Installed a gasket set on the carbs after an ultrasonic dip and the lot was ready to go back where it belonged. Was also pleased to find out that engine and framenumbers matched. Ah yeah, the engine covers still needed polishing........

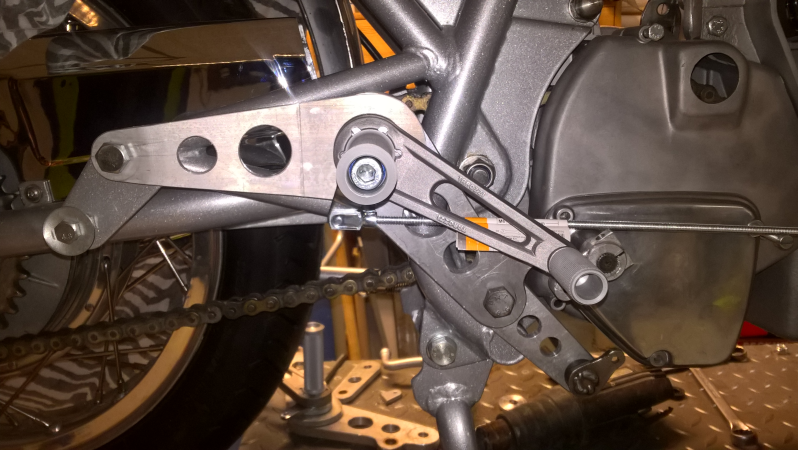
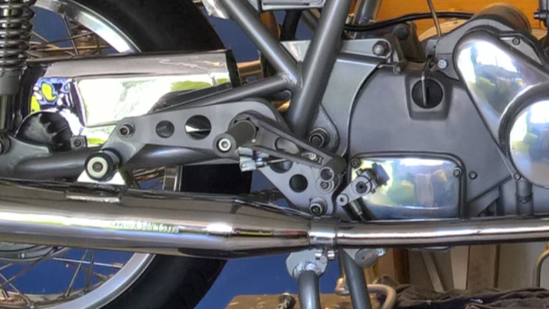
Footrests
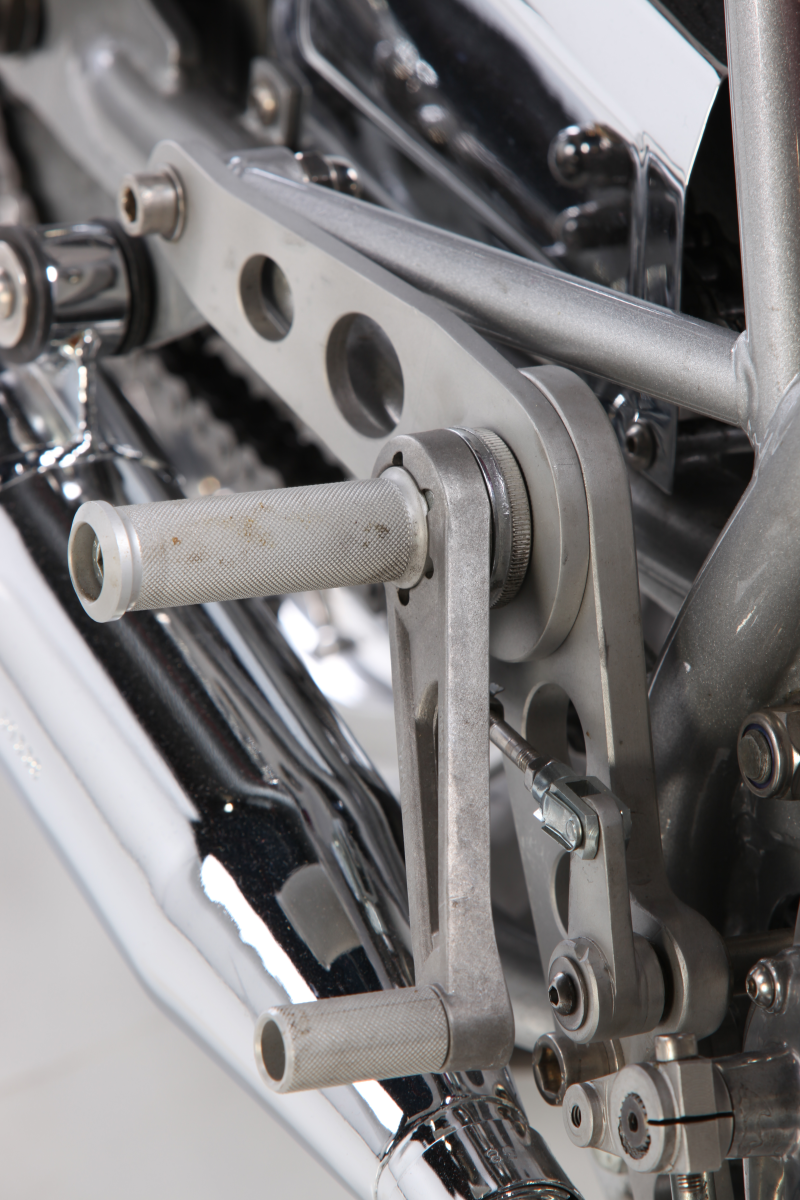
It's finally looking like a motorbike again. To stay with the classic caferacer look, a pair of clipons or Mbars are of course of the essence. To keep the bike rideable for me with my rapidly growing birthday collection I decided Mbars were probably the least contortionistic option. So a pair of Fehling bars were purchased and a pair of Hagons to take care of the rear suspension or what passes as such......The original Koni's being..... well, I suppose I could've resqued one, the other having a bent pistonrod. So I made a friend happy with them. That left the footpeg arrangement. The originals don't look very racey and there is the thing of the left hand brake / right hand gearshift layout. This is fine if the SF is your only bike and you can get used to it. But as I make most kilometers on my Guzzi Breva I fear I may hit the wrong lever regularly. So a conversion was welcome. Laverda did make a conversion kit for some of the latest models back in the days. But this was a far from elegant affair with a rod running over the top of the gearbox. So I set about finding a solution for that. Also purchased a Tarozzi peg set which had to be mounted on the bike somehow. So a pair of gussets were jigsawed from a 12mm thick aluminium plate which apart from the footrests also support two shafts to swap shifting and braking motion. There was just enough room to accomodate them without having to alter anything on the frame and using the original mounting points. This also took care of the, in my eyes, obsolete looking pillion footrest supports. The bike being a oneseater. Now they had a purpose. So all in all I think it looks pretty neat and even functions reasonably well.
Finishing touches
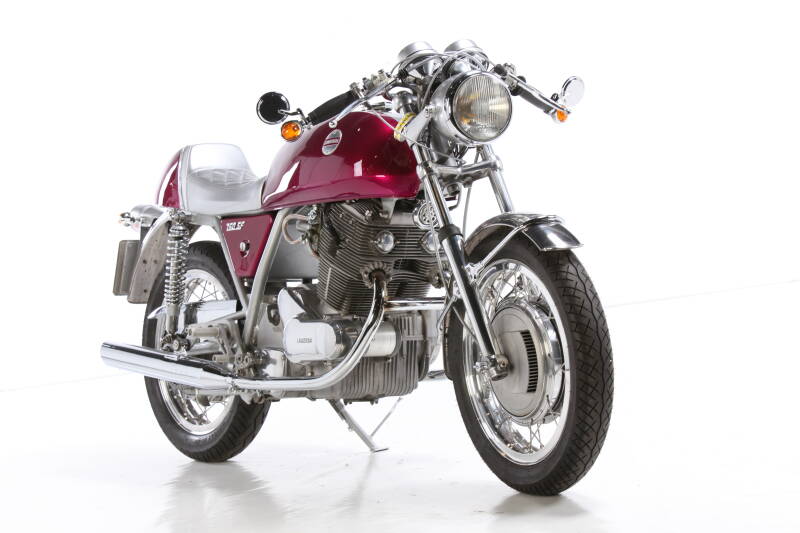
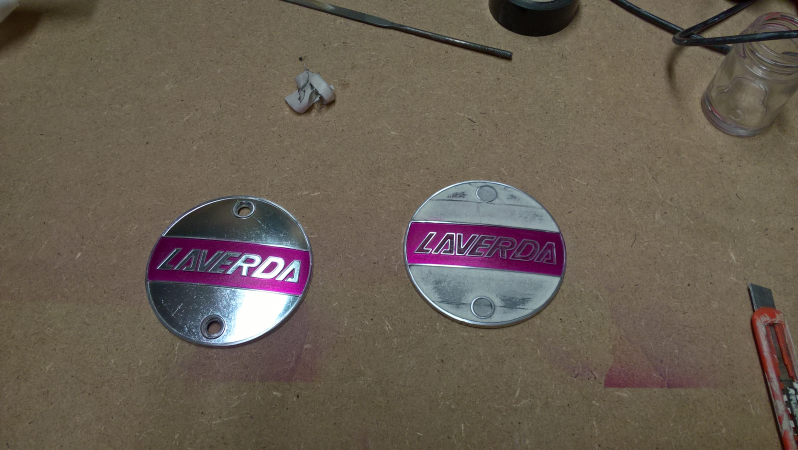
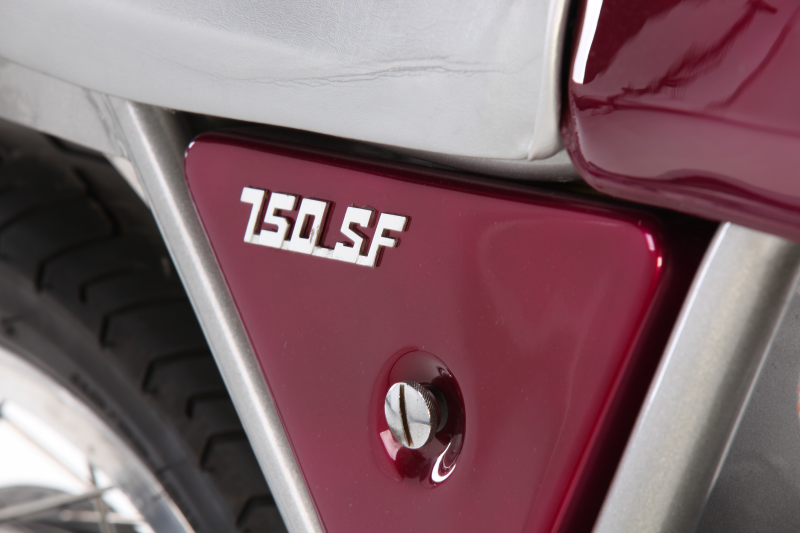
So after a year or two it was finally time for a bit of detailing. I resprayed the tacho and speedo in metallic silver and replaced black control cables for silvergray ones. Covered the tacho and speedo cable in silvergray shrinkwrap and installed a pair of bar end indicators and mirrors. Then the only thing left was the Laverda badges on the tank. The badges were a bit smudgy but finally I decided that the red/white/green of the Italian flag really did not go with the purple. Maybe that is why there weren't any produced in that colour? So I did what according to purists probably amounts to sacriledge and gave the badges a colourscheme matching the bike. Please go easy on me, it's only paint after all. Ah yes, and I had the seat upholstered in silver of course. Thanks to Harry Schellevis in Ilpendam who's done a great job.
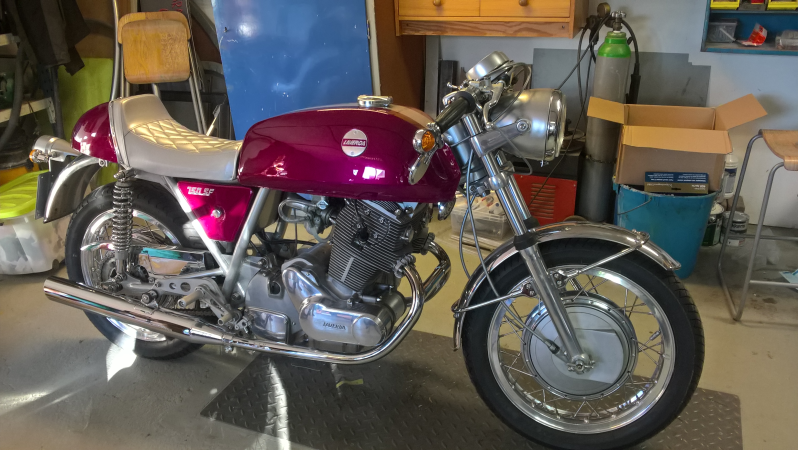
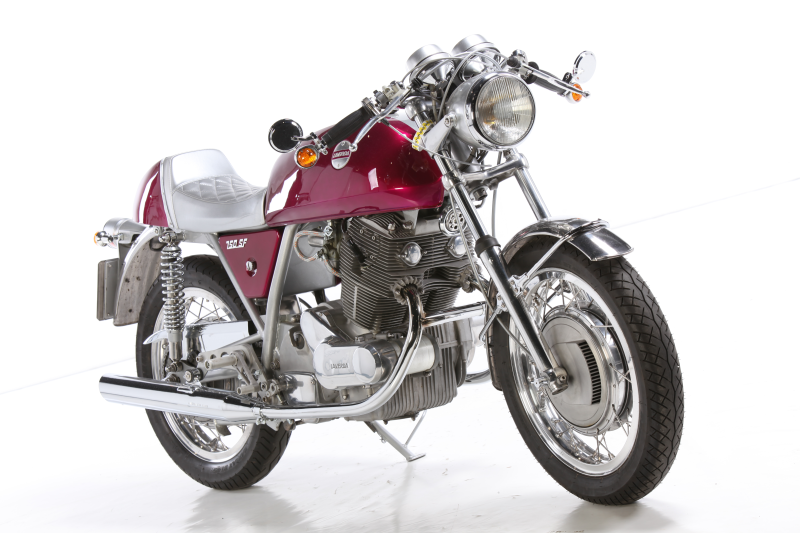
The big moment
Finally the day arrived where she would run again after having collected dust for a few decades. At least if everything would go according to plan. Well, see the result in the vid on the left...... Ah no can do, the free version of the internet host of this site does not support video. So unfortunately I can't share the "big moment" with you now. But it ran as soon as I hit the starter button, despite the fact the carbs hadn't been adjusted yet. So I'll leave you with a foto impression below, taken at the Utrecht bike fair in 2018. I know it won't be to everyones tast, to some it may look like a fairground attraction, but I think the seventies were like that. Evel Knievel and Easy Rider. Everytime I look at it the decades fall away and that what it is all about.
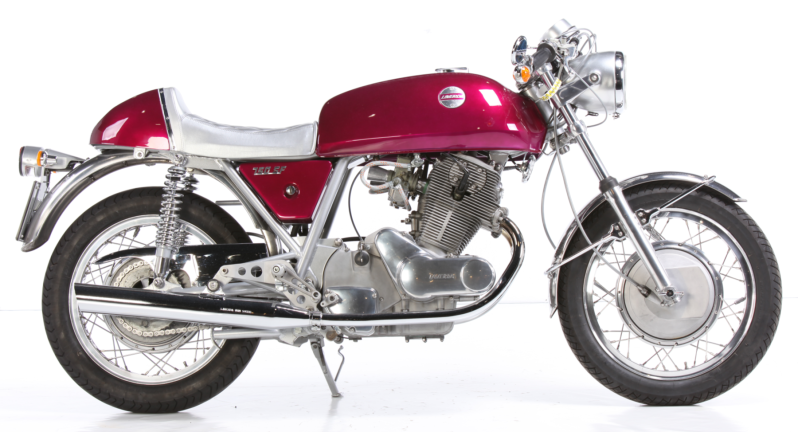
Laverda 750SF
Maak jouw eigen website met JouwWeb